cURL (client URL, or simply written as curl) is a powerful command-line tool that can transfer data with various protocols, including HTTP, HTTPS, FTP, and SFTP, from one server to another. Web scraping using cURL is a popular option as it handles multiple requests simultaneously for extracting data from different web pages at once.
Key Features of cURL
cURL is a free and open-source tool that is pre-installed on most operating systems, like Linux/Unix, macOS, and Windows. Web scraping with cURL can be considered a great choice when it comes to speed and efficiency of its high-volume data extraction. Some of the other useful features that cURL offers are:
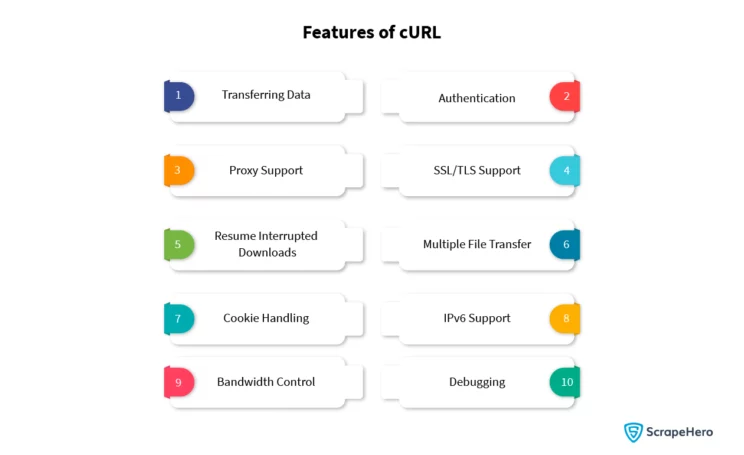
Transferring Data
cURL can be used for transferring data to and from servers. It also supports different protocols and can be used to upload and download files from even remote servers.
Authentication
cURL supports authentication methods like Basic, Kerberos, Digest, and NTLM that are used for authentication with web servers such as FTP servers that need authentication. Due to this feature web scraping using cURL is a good choice.
Proxy Support
cURL can support proxies such as HTTP, HTTPS, SOCKS4, and SOCKS5. It can also be configured to use a single proxy server for all requests or for specific requests.
SSL/TLS Support
cURL supports the encryption protocols SSL and TLS. It is also used for making secure connections to servers that need encryption.
Resume Interrupted Downloads
cURL resumes downloads from where it left off that were interrupted due to a network error or any other related issues.
Multiple File Transfer
cURL transfers multiple files at once, so it is used to download or upload multiple files simultaneously. This feature also contributes greatly to web scraping using cURL.
Cookie Handling
cURL can be used to send and receive cookies to and from servers. This feature makes web scraping using cURL even more efficient, as cookies can mimic web browsers and avoid blocking the scraper.
IPv4/IPv6 Support
cURL supports both IPv4 and IPv6. So it is used to connect to servers using IPv4 and IPv6 addresses.
Bandwidth Control
cURL can control the bandwidth used for transfers. It can also be configured to a specific value, limiting the transfer rate.
Debugging
Debugging features that help developers troubleshoot issues with their applications are also a highlighted feature of cURL. It is used to view the headers and content of requests and responses.
Web Scraping With cURL
Setting Up cURL
Before you begin web scraping with cURL make sure that you have already installed cURL. Most operating systems have cURL pre-installed. You can check this by running “curl –version” in your terminal. If it is not present, then install it on your system through the package manager specific to your OS.
Syntax:
curl --versionOutput:
curl 7.68.0 (x86_64-pc-linux-gnu) libcurl/7.68.0 OpenSSL/1.1.1f zlib/1.2.11 brotli/1.0.7 libidn2/2.2.0 libpsl/0.21.0 (+libidn2/2.2.0) libssh/0.9.3/openssl/zlib nghttp2/1.40.0 librtmp/2.3
Release-Date: 2020-01-08
Protocols: dict file ftp ftps gopher http https imap imaps ldap ldaps pop3 pop3s rtmp rtsp scp sftp smb smbs smtp smtps telnet tftp
Features: AsynchDNS brotli GSS-API HTTP2 HTTPS-proxy IDN IPv6 Kerberos Largefile libz NTLM NTLM_WB PSL SPNEGO SSL TLS-SRP UnixSocketsDepending on the operating system, the installation also varies.
- Linux: For Linux systems, open the terminal and run the command: apt install curl
- Mac: For Mac systems, open the terminal and run the command: brew install curl
Installation Process for Other Operating Systems
Refer to the following link to learn about the installation process for your operating system:
https://everything.curl.dev/get
Send a Simple HTTP GET Request With cURL
The basic cURL command to send an HTTP Request to a URL is:
Syntax:
curl [options] [URL]This makes a GET request to the URL and displays the response.
The [options] are various flags that modify the behavior of cURL.
The [URL] is the target website to scrape.
A basic web scraping request with cURL looks like this:
Example:
curl https://httpbun.com/anythingOutput:
{
"method": "GET",
"args": {},
"headers": {
"Accept": "*/*",
"Connection": "close",
"Host": "httpbun.com",
"User-Agent": "curl/7.68.0"
},
"origin": "",
"url": "https://httpbun.com/anything",
"form": {},
"data": "",
"json": null,
"files": {}
}Send a simple HTTP POST request
For web scraping with cURL, you may need to send HTTP POST Requests. Use -d option for sending a formdata in an HTTP POST request.
Syntax:
curl -d [URL]Example:
curl -d user=password https://httpbun.com/anything“user=password” is the formdata that is sent.
Now cURL passes the data to the server using the content-type header value “application/x-www-form-urlencoded”.
Output:
{
"method": "POST",
"args": {},
"headers": {
"Accept": "*/*",
"Connection": "close",
"Content-Length": "13",
"Content-Type": "application/x-www-form-urlencoded",
"Host": "httpbun.com",
"User-Agent": "curl/7.68.0"
},
"origin": "",
"url": "https://httpbun.com/anything",
"form": {
"user": "password"
},
"data": "",
"json": null,
"files": {}
}Change the HTTP Request Method
In web scraping using cURL, when communicating with the HTTP server, you can specify a custom request method instead of the default GET request method.
Syntax:
curl -X [URL]Example:
curl -X PUT https://httpbun.com/putSend an HTTP PUT request to https://httpbun.com/put
Output:
{
"method": "PUT",
"args": {},
"headers": {
"Accept": "*/*",
"Connection": "close",
"Host": "httpbun.com",
"User-Agent": "curl/7.68.0"
},
"origin": "",
"url": "https://httpbun.com/put",
"form": {},
"data": "",
"json": null,
"files": {}
}Save HTTP Response to a File
Save the HTTP response to extract data points. Use -o option to write HTTP response output to <file> instead of stdout.
Syntax:
curl -o [URL]Example:
curl -o response.json https://httpbun.com/anything</code> The response is saved to response.json file. <strong>Output:</strong></pre>
<pre><code>% Total % Received % Xferd Average Speed Time Time Time Current
Dload Upload Total Spent Left Speed
100 293 100 293 0 0 198 0 0:00:01 0:00:01 --:--:-- 197Changing the User-Agent Header
The User-Agent string identifies the client type for the server. cURL uses the default User-Agent string curl/<version>. This User-Agent string can be changed by adding the -A option followed by the new User-Agent string.
Syntax:
curl -A [URL]Example:
curl -A "Mozilla/5.0 (X11; Linux x86_64) AppleWebKit/537.36 (KHTML, like Gecko) Chrome/116.0.0.0 Safari/537.36" https://httpbun.com/anythingThis will use the User-Agent string Mozilla/5.0 (X11; Linux x86_64) AppleWebKit/537.36 (KHTML, like Gecko) Chrome/116.0.0.0 Safari/537.36 to access the website https://httpbun.com/anything.
Output:
{
"method": "GET",
"args": {},
"headers": {
"Accept": "*/*",
"Connection": "close",
"Host": "httpbun.com",
"User-Agent": "Mozilla/5.0 (X11; Linux x86_64) AppleWebKit/537.36 (KHTML, like Gecko) Chrome/116.0.0.0 Safari/537.36"
},
"origin": "",
"url": "https://httpbun.com/anything",
"form": {},
"data": "",
"json": null,
"files": {}
}Setting Referer in HTTP Headers
The server can identify referring pages from which people are visiting or where requested resources are being used with the help of the Referer header.
Syntax:
curl -e [URL]Example:
curl -e https://httpbun.com https://httpbun.com/anythingOutput:
{
"method": "GET",
"args": {},
"headers": {
"Accept": "*/*",
"Connection": "close",
"Host": "httpbun.com",
"Referer": "https://httpbun.com",
"User-Agent": "curl/7.68.0"
},
"origin": "",
"url": "https://httpbun.com/anything",
"form": {},
"data": "",
"json": null,
"files": {}
}Adding Custom HTTP Headers
Adding headers and overriding headers is beneficial while web scraping with cURL. You can add custom headers using the -H option.
Syntax:
curl -H <header> [URL]Example:
curl -H "custom-header:dummy" https://httpbun.com/anything</code> Send an HTTP request with a custom header with a value as mentioned. <strong>Output:</strong></pre>
<pre><code>
{
"method": "GET",
"args": {},
"headers": {
"Accept": "*/*",
"Connection": "close",
"Custom-Header": "dummy",
"Host": "httpbun.com",
"User-Agent": "curl/7.68.0"
},
"origin": "",
"url": "https://httpbun.com/anything",
"form": {},
"data": "",
"json": null,
"files": {}
}Getting HTTP Response Headers
Use the option -I in order to fetch the Response headers.
Syntax:
curl -I [URL]Example:
curl -I https://httpbun.com/anythingOutput:
HTTP/2 200
server: nginx
date: Thu, 14 Sep 2023 12:19:09 GMT
content-type: application/json
content-length: 295
x-powered-by: httpbun/44326ef87d3b584ecb21bdb7c95edb
strict-transport-security: max-age=31536000; includeSubDomains; preload
content-security-policy: frame-ancestors 'none'
x-content-type-options: nosniffSending HTTP Request With Cookies
At times, there’s a need to pass cookies along with the requests while web scraping with cURL. Pass the data in the Cookie header to the HTTP server.
Syntax:
curl -b <data|filename> [URL]Example :
curl -b d=k https://httpbun.com/anythingOutput:
{
"method": "GET",
"args": {},
"headers": {
"Accept": "*/*",
"Connection": "close",
"Cookie": "d=k",
"Host": "httpbun.com",
"User-Agent": "curl/7.68.0"
},
"origin": "",
"url": "https://httpbun.com/anything",
"form": {},
"data": "",
"json": null,
"files": {}
}Saving HTTP Response Cookies
Cookies can be used to maintain sessions. Use cURL to save cookies by adding the -c option:
Syntax:
curl -c <filename> [URL]Example:
curl -c cookies.txt https://httpbun.com/cookies/set/cookie_key/cookie_valueHTTP Response cookies are now saved to the cookie.txt file.
Sending HTTP Request With Proxy
During web scraping using cURL, proxies can be used to hide your IP address and location. Use cURL with proxies by adding the -x option, along with the proxy address and port number.
Syntax:
curl -x [protocol://]host[:port] [URL]Example:
curl -x http://dummyproxy:port https://httpbun.com/anythingThis will use the proxy server at http://dummyproxy:port to access the website https://httpbun.com/anything.
Set a Max Time for HTTP Request
Set a maximum time for each transfer to take place. You can use the –max-time <fractional seconds> option in cURL. This way, your request doesn’t hang indefinitely.
Syntax:
curl --max-time <fractional seconds> [URL]Example:
curl --max-time 1 https://httpbun.com/anythingHere, a request with a maximum time of 1 second is sent.
Output:
curl: (28) Operation timed out after 1000 milliseconds with 0 bytes receivedAllow HTTP Redirects
Many websites use redirects. To follow redirects automatically, use the -L option:
Syntax:
curl -L [URL]Example:
curl -L https://httpbun.com/redirect/1Output:
{
"method": "GET",
"args": {},
"headers": {
"Accept": "*/*",
"Connection": "close",
"Host": "httpbun.com",
"User-Agent": "curl/7.68.0"
},
"origin": "",
"url": "https://httpbun.com/anything",
"form": {},
"data": "",
"json": null,
"files": {}
}Set Max Redirects
Set the maximum number of redirects to follow.
Syntax:
curl --max-redirs -L [URL]Example:
curl --max-redirs 4 -L https://httpbun.com/redirect/5Output:
curl: (47) Maximum (4) redirects followedHandling HTTP Basic Authentication
Refer to the following link to learn the workings of basic HTTP authentication.
https://developer.mozilla.org/en-US/docs/Web/HTTP/Authentication
Use the –basic option to instruct cURL to utilize HTTP basic authentication with the remote host.
When a request is sent to a basic authentication endpoint, it will ask for authentication with a 401 status.
curl https://httpbun.com/basic-auth/user/passUse the option – basic. This option is used alone with the -u option.
Syntax:
curl -u username:password --basic [URL]Example:
curl -u user:pass --basic https://httpbun.com/basic-auth/user/passOutput:
{
"authenticated": true,
"user": "user"
}Wrapping Up
cURL is a versatile and multipurpose command-line tool that can also be used for web scraping. This article has guided you through the concept of web scraping using cURL and how it is used to extract the desired website data. You have also learned to use cURL with proxies and change the User-Agent string.
Understanding cURL is important to building a scraper for small-scale web scraping purposes. But for enterprises that need massive-scale scraping, what matters is the assistance of a reputed enterprise-grade web scraping service provider like ScrapeHero that they can rely on.