Web scraping is the best method to gather data from websites. Scraping tools such as Web Scraper help users to scrape websites easily. In this post we will show you how to scrape data using the Web Scraper Chrome Extension.
Prerequisites
- Google Chrome Browser – You will need to download the Chrome browser. The extension requires Chrome 49+.
- Web Scraper Chrome Extension – The Web Scraper extension can be downloaded from the Chrome Web Store. After downloading the extension you will see a spider icon in your browser toolbar.
Creating a Sitemap
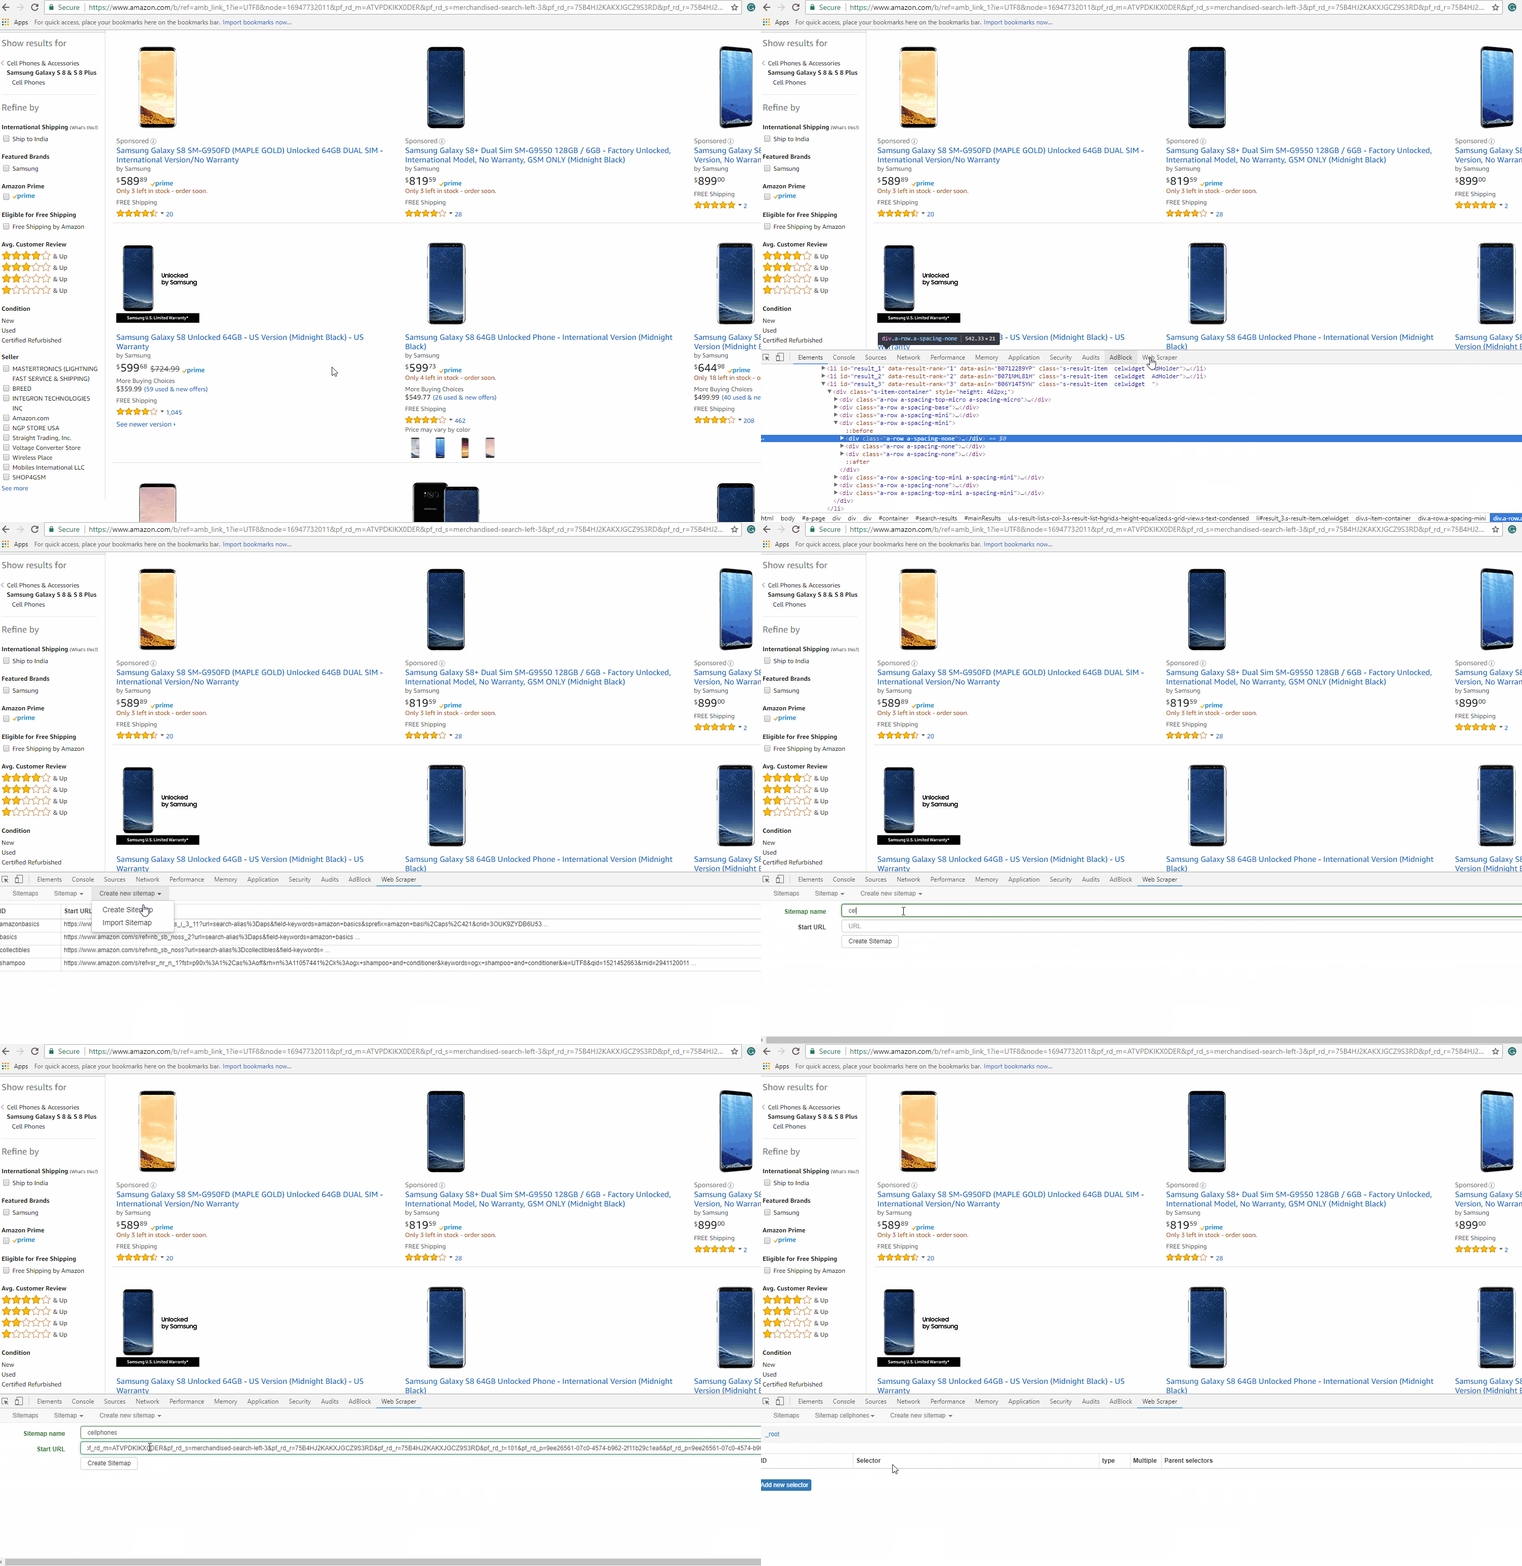
After downloading the Web Scraper Chrome extension you’ll find it in developer tools and see a new toolbar added with the name ‘Web Scraper’. Activate the tab and click on ‘Create new sitemap‘, and then ‘Create sitemap‘. Sitemap is the Web Scraper extension name for a scraper. It is a sequence of rules for how to extract data by proceeding from one extraction to the next. We will set the start page as the cellphone category from Amazon.com and click ‘Create Sitemap’. The GIF illustrates how to create a sitemap:
Navigating from root to category pages
Right now, we have the Web Scraper tool open at the _root with an empty list of child selectors
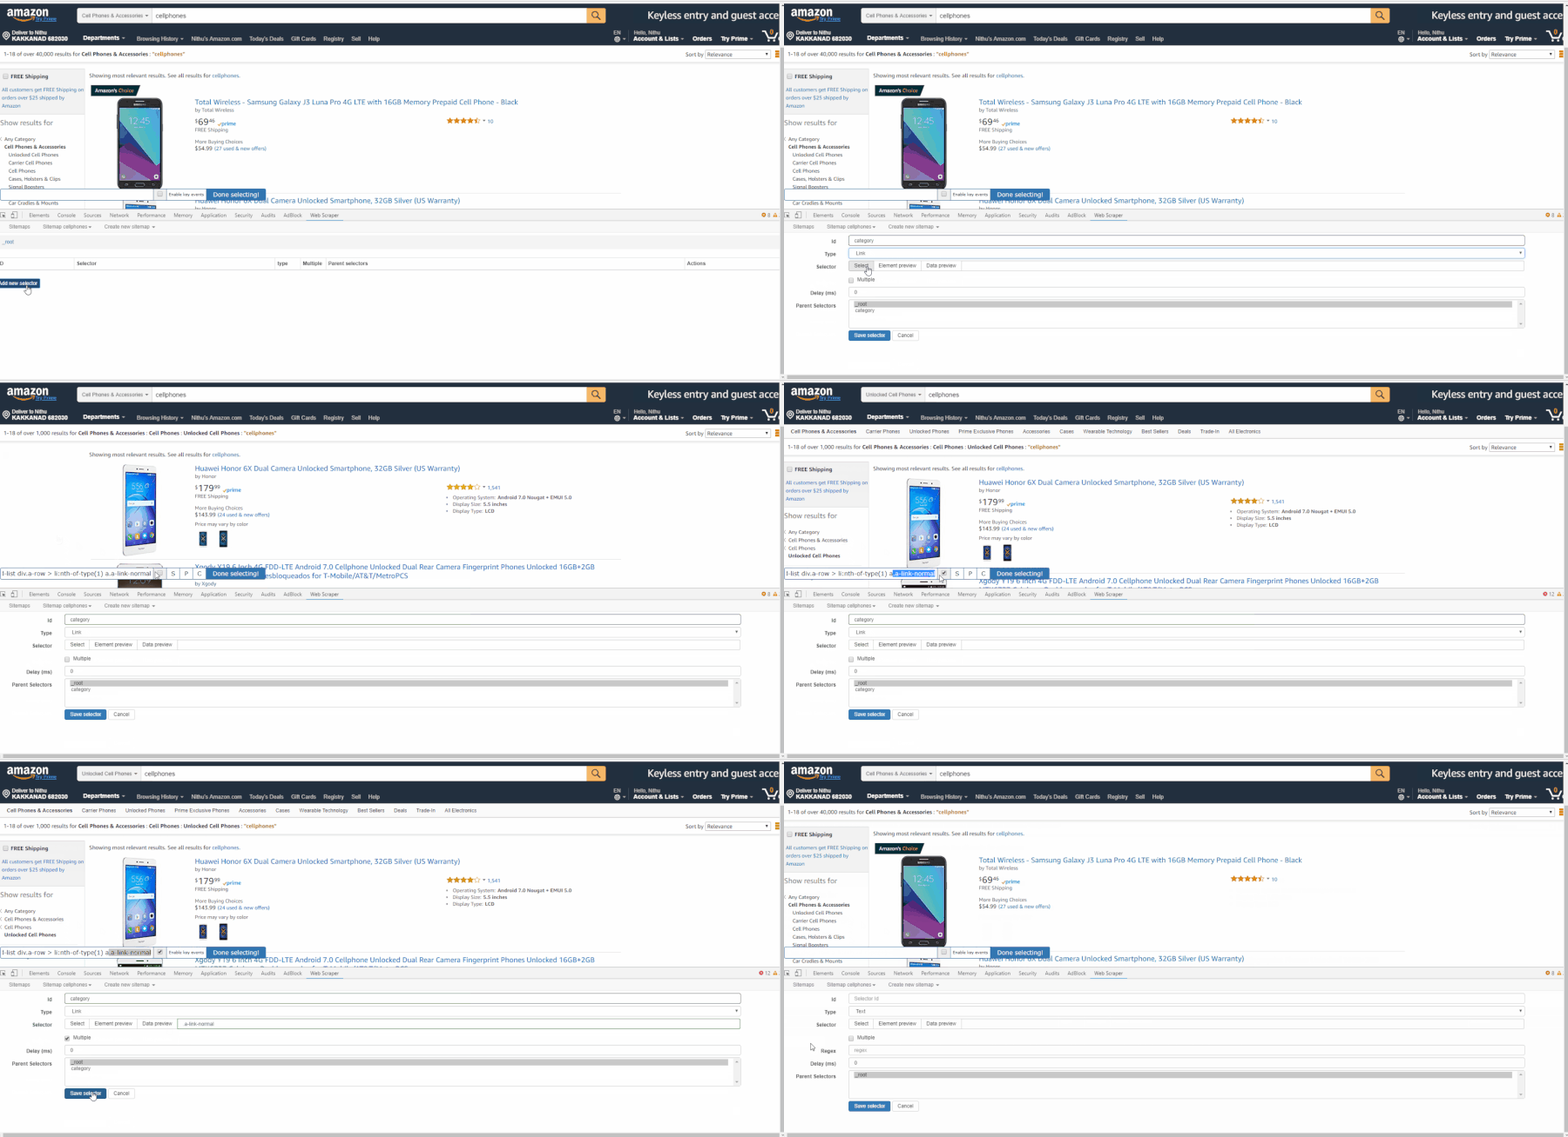
Click ‘Add new selector’. We will add the selector that takes us from the main page to each category page. Let’s give it the id category, with its type as link. We want to fetch multiple links from the root, so we will check the Multiple box below. The ‘Select button’ gives us a tool for visually selecting elements on the page to construct a CSS selector. ‘Element Preview’ highlights the elements on the page and ‘Data Preview’ pops up a sample of the data that would be extracted by the specified selector.
Click select on one of the category links and a specific CSS selector will be filled on the left of the selection tool. Click one of the other (unselected) links and the CSS selector should be adjusted to include it. Keep clicking on the remaining links until all of them are selected. The GIF below shows the whole process on how to add a selector to a sitemap:
A selector graph consists of a collection of selectors – the content to extract, elements within the page and a link to follow and continue the scraping. Each selector has a root (parent selector) defining the context in which the selector is to be applied. This is the visual representation of the final scraper (selector graph) for our Amazon Cellphone Scraper:
Here the root represents the starting URL, the main page for Amazon Cellphone. From there the scraper gets a link to each category page and for each category, it extracts a set of product elements. Each product element, extracts a single name, a single review, a single rating, and a single price. Since there are multiple pages we need the next element of the scraper to go into every page available.
Running the scraper
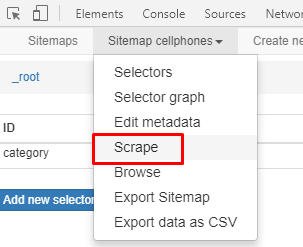
Click Sitemap to get a drop-down menu and click Scrape as shown below
The scrape pane gives us some options about how slowly Web Scraper should perform its scraping to avoid overloading the web server with requests and to give the web browser time to load pages. We are fine with the defaults, so click ‘Start scraping’. A window will pop up, where the scraper is doing its browsing. After scraping the data you can download it by clicking the option ‘Export data as CSV’ or save it to a database.
Download the Data
To download the scraped data as a CSV file that you can open in Microsoft Excel or Google Sheets, go to the Sitemap drop down > Export as CSV > Download Now.
We can help with your data or automation needs
Turn the Internet into meaningful, structured and usable data
Disclaimer: Any code provided in our tutorials is for illustration and learning purposes only. We are not responsible for how it is used and assume no liability for any detrimental usage of the source code. The mere presence of this code on our site does not imply that we encourage scraping or scrape the websites referenced in the code and accompanying tutorial. The tutorials only help illustrate the technique of programming web scrapers for popular internet websites. We are not obligated to provide any support for the code, however, if you add your questions in the comments section, we may periodically address them.


