Puppeteer the node.js library that allows you to control Google’s Chrome or Chromium browser, can be used for taking screenshots of websites. If you are extracting data from web pages, you may want to verify the data later. Using screenshots is a great solution to check if the data extracted is correct. At times you may scrape a page but fail to get the data, you can take a screenshot to know why.
In this post, we will show you how to capture screenshots based on different device sizes and screen resolutions.
The quick answer:
const puppeteer = require('puppeteer');

async function run() {
    let browser = await puppeteer.launch({ headless: false });
    let page = await browser.newPage();
    await page.goto('https://www.scrapehero.com/');
    await page.screenshot({ path: './image.jpg', type: 'jpeg' });
    await page.close();
    await browser.close();
}

run();
For those among you who would like to know more, keep reading.
Required Tools
If you already know how to install Puppeteer, please skip to the next section.
You need to first install node.js and write the code to automate and capture screenshots in JavaScript. Puppeteer requires at least Node v7.6.0 or greater but for this tutorial, we will go with Node v9.0.0.
Installing Node.js
Linux
You can head over to Nodesource and choose the distribution you want. Here are the steps to install node.js in Ubuntu 16.04:
- Open a terminal run –
sudo apt install curlin case it’s not installed. -
Then run –
curl -sL https://deb.nodesource.com/setup_9.x | sudo -E bash - -
Once that’s done, install node.js by running,
sudo apt install nodejs. This will automatically install npm.
Windows and Mac
To install node.js in Windows or Mac, download the package for your OS from Nodes JS’s website https://nodejs.org/en/download/
Generating Screenshots with Puppeteer
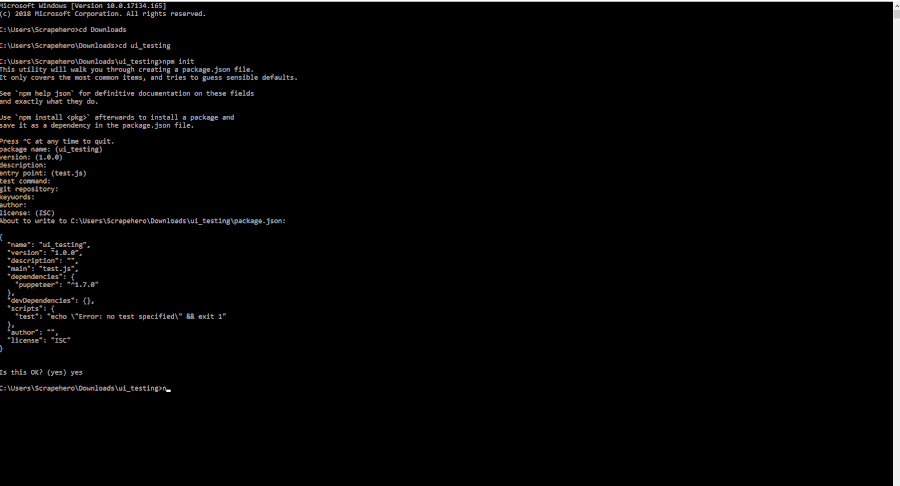
Now that we have node.js installed, let’s create a directory called ui_testing and open the command prompt or terminal. Go into the directory and run the command:
npm init
Hit enter for each question asked. This will create a file called package.json inside the directory.
Next, we’ll have to run the command to install puppeteer:
npm install puppeteer --save
The installation could take a couple of minutes. This is because unlike most other frameworks for headless testing, Puppeteer automatically downloads a version of Chromium for you (about 130mb). That’s actually a great feature since you won’t have to set up a local instance of Chrome manually.
Taking a Screenshot
Capturing a screenshot is very simple. We’ll start with the most basic one and build on that. The script below will start a browser, open a page, and take a screenshot of all of its contents.
const puppeteer = require('puppeteer');

async function run() {
    let browser = await puppeteer.launch({ headless: false });
    let page = await browser.newPage();
    await page.goto('https://www.scrapehero.com/');
    await page.screenshot({ path: './image.jpg', type: 'jpeg' });
    await page.close();
    await browser.close();
}

run();
Running the script
To run our puppeteer script you must save the code (in our case test.js) inside the directory you have created and run the file with node:
node test.js
If there are no errors you should have an image file in your working directory.
The GIF above shows how the screenshot is captured. We have named our screenshot as image.jpg in the code. You’ll find it in the directory once the Chromium browser is closed.
When taking the screenshot, Puppeteer will simulate a browser window with the default width. If the page we are testing is responsive, we’ll get a snapshot of what it looks like at that viewport. Puppeteer sets the default page size to 800 x 600, which defines the screenshot size, but we can change the dimension in setViewport method like this:
await page.setViewport({ width: 1920, height: 1080 });
If you want to run it in headless mode, you need to remove the line ({ headless: false });
By default, Puppeteer saves images as PNG. You can change it to jpeg format by adding it in type:
await page.screenshot({ path: './image.jpg', type: 'jpeg' });
Taking the screenshot of the entire page
This script will generate the screenshot of the entire page. We have added the option fullPage:true
const puppeteer = require('puppeteer');

async function run() {
    let browser = await puppeteer.launch({ headless: false });
    let page = await browser.newPage();
    await page.setViewport({ width: 1920, height: 1080 });
    await page.goto('https://en.wikipedia.org/wiki/Main_Page');
    await page.screenshot({ path: './image.png', fullPage: true });
}

run();
Taking the screenshot of a specific area
If you only need the screenshot of a specific area you can insert the x and y coordinates and the width and height of the image:
const puppeteer = require('puppeteer');

async function run() {
let browser = await puppeteer.launch({ headless: false });
let page = await browser.newPage();
await page.setViewport({ width: 1920, height: 1080 });
await page.goto('https://en.wikipedia.org/wiki/Main_Page');
await page.screenshot({ path: './image.jpg', type: 'jpeg', clip: { x: 0, y: 0, width: 200, height: 400 } });
}

run();
Taking a screenshot at a particular viewport
Sometimes you want to see how your website looks on certain screen sizes. Puppeteer helps you mimic those screen sizes so that you can test how your website looks on those screens.
Here is an example to take screenshots at 1366×768 which is still widely used in older computers:
const puppeteer = require('puppeteer');

async function run() {
let browser = await puppeteer.launch({ headless: false });
let page = await browser.newPage();
await page.setViewport({ width: 1366, height: 768 });
await page.goto('https://www.scrapehero.com/');
await page.screenshot({ path: './image.jpg', type: 'jpeg' });
}

run();
You can change the width and the height of the viewport to your desired resolution if you want to test it on other screen sizes. We have provided example codes of some popular smartphones below:
iPhone 8
const puppeteer = require('puppeteer');
const devices = require('puppeteer/DeviceDescriptors');
const iPhone = devices[ 'iPhone 8' ];

async function run() {
    let browser = await puppeteer.launch({ headless: false });
    let page = await browser.newPage();
    await page.emulate(iPhone);
    await page.goto('https://www.scrapehero.com/');
    await page.screenshot({ path: './image.jpg', type: 'jpeg' });
    await page.close();
    await browser.close();
}

run();
Google Pixel 2
const puppeteer = require('puppeteer');
const devices = require('puppeteer/DeviceDescriptors');
const pixel = devices[ 'Pixel 2' ];

async function run() {
let browser = await puppeteer.launch({ headless: false });
let page = await browser.newPage();
await page.emulate(pixel);
await page.goto('https://www.scrapehero.com/');
await page.screenshot({ path: './image.jpg', type: 'jpeg' });
await page.close();
await browser.close();
}

run();
Learn how to scrape data from websites using Puppeteer and Node.js
Web Scraping with Puppeteer and NodeJS
If you are looking for a way to emulate screenshots and automate your browser tests, Puppeteer is probably the most user-friendly tool out there. It has a very well structured API and has a documentation that is easy to follow. Since Puppeteer is based on Headless Chrome, you won’t be able to test any browsers other than Chrome. For automating other platforms you might want to try the Selenium framework. You can check out our blog: