
Finding Amazon discounts by hand means opening search pages, noting prices, and repeating the process every day. That does not scale for sellers, affiliates, or deal hunters. Build an n8n Amazon discount tracker to run the searches on a schedule and log only the products that are actually discounted.
This tutorial shows how to build an n8n workflow that:
- Reads search keywords from Google Sheets
- Fetches Amazon search results through ScrapeHero’s Amazon Search API
- Keeps only the products that have both a sale price and a regular price
- Calculates the discount percentage and saves each deal to a Google Sheets tab named with the day’s date
What You’ll Learn
- How to build an Amazon discount tracker with ScrapeHero’s Amazon Search API.
- How to store search keywords in a Google Sheets tab and read them into the workflow.
- How to run the workflow once a day and create a new tab named with the day’s date for each run.
- How to process each keyword individually and fetch its Amazon search results.
- How to split the search results so every product becomes its own item.
- How to keep only products that have both a sale_price and a regular_price.
- How to calculate the % OFF for each deal in the Edit Fields node.
- How to save each deal to the dated tab and use ASIN to avoid duplicate rows.
- How to keep the loop running when a keyword returns no discounted products.
- How to test the workflow.
Before You Begin
Before creating the n8n Amazon price monitoring workflow, prepare the following:
- An n8n account or self-hosted n8n installation.
- A Google Cloud OAuth client ID and client secret.
- A Google Sheets document with a tab named Keywords.
- A ScrapeHero account and API key.
The Keywords tab needs one column with the header Keyword:
| Keyword |
|---|
| smart watches |
| wireless headphones |
| robot vacuum |
Create the n8n Amazon Discount Tracker Workflow
1. Add a Schedule Trigger
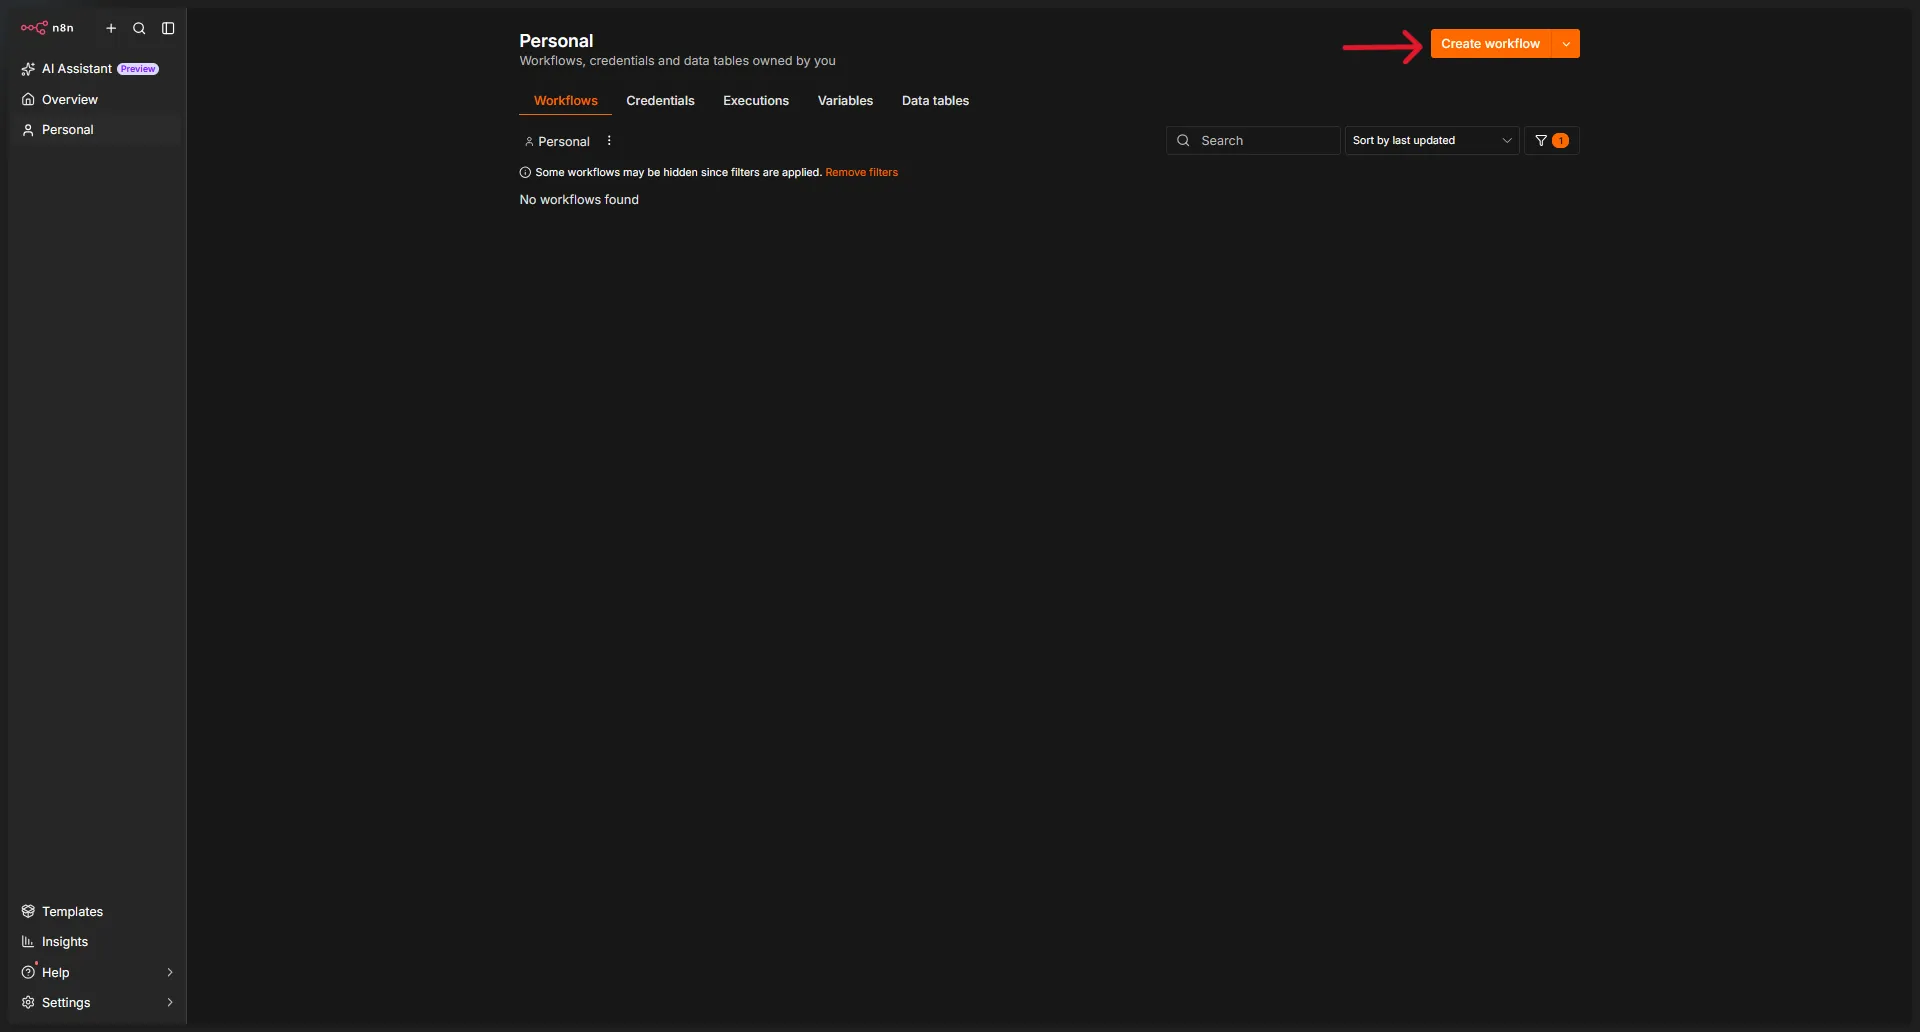
On your n8n dashboard, click “Create Workflow” to open a new canvas with a big plus sign in the center.
Click the plus icon, search for Schedule Trigger, and click it to add it to the workflow.
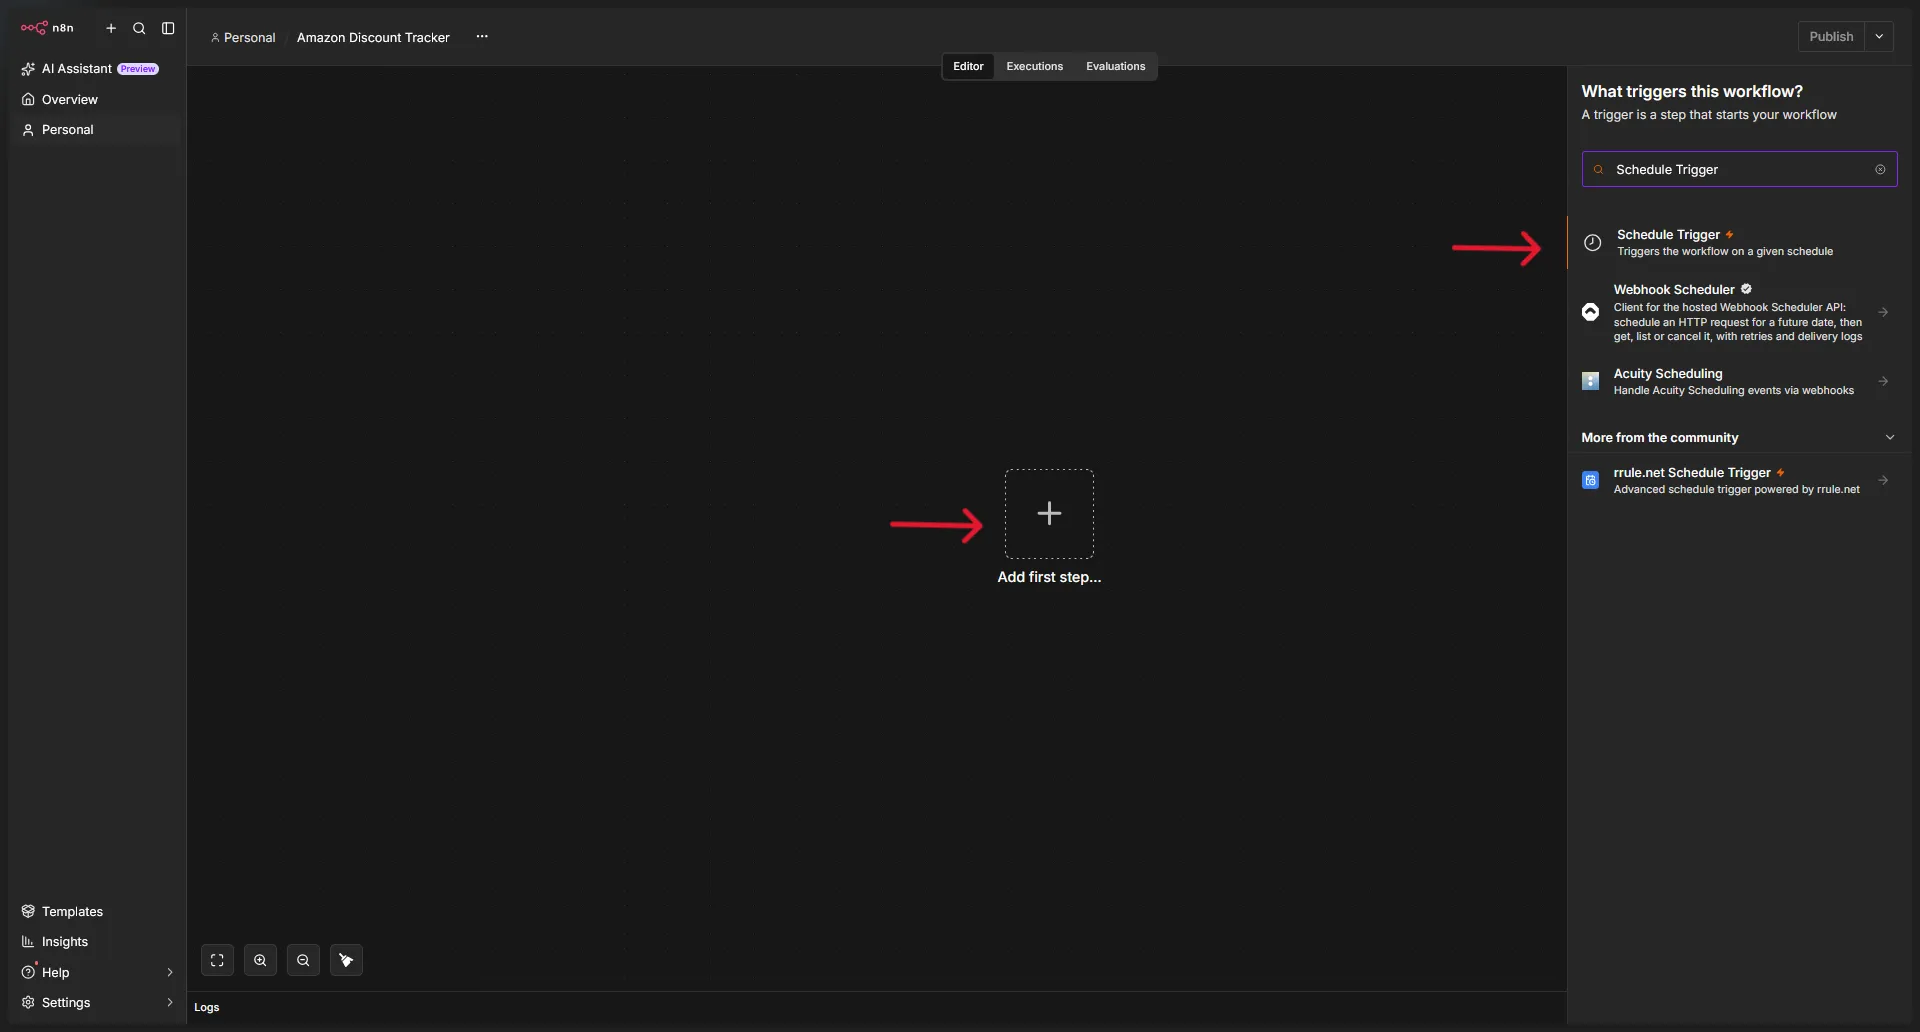
Adding the node opens its configuration window.
The Schedule Trigger decides how often n8n looks for discounts. Set it to run once a day, for example at 06:00.
2. Create a Dated Sheet
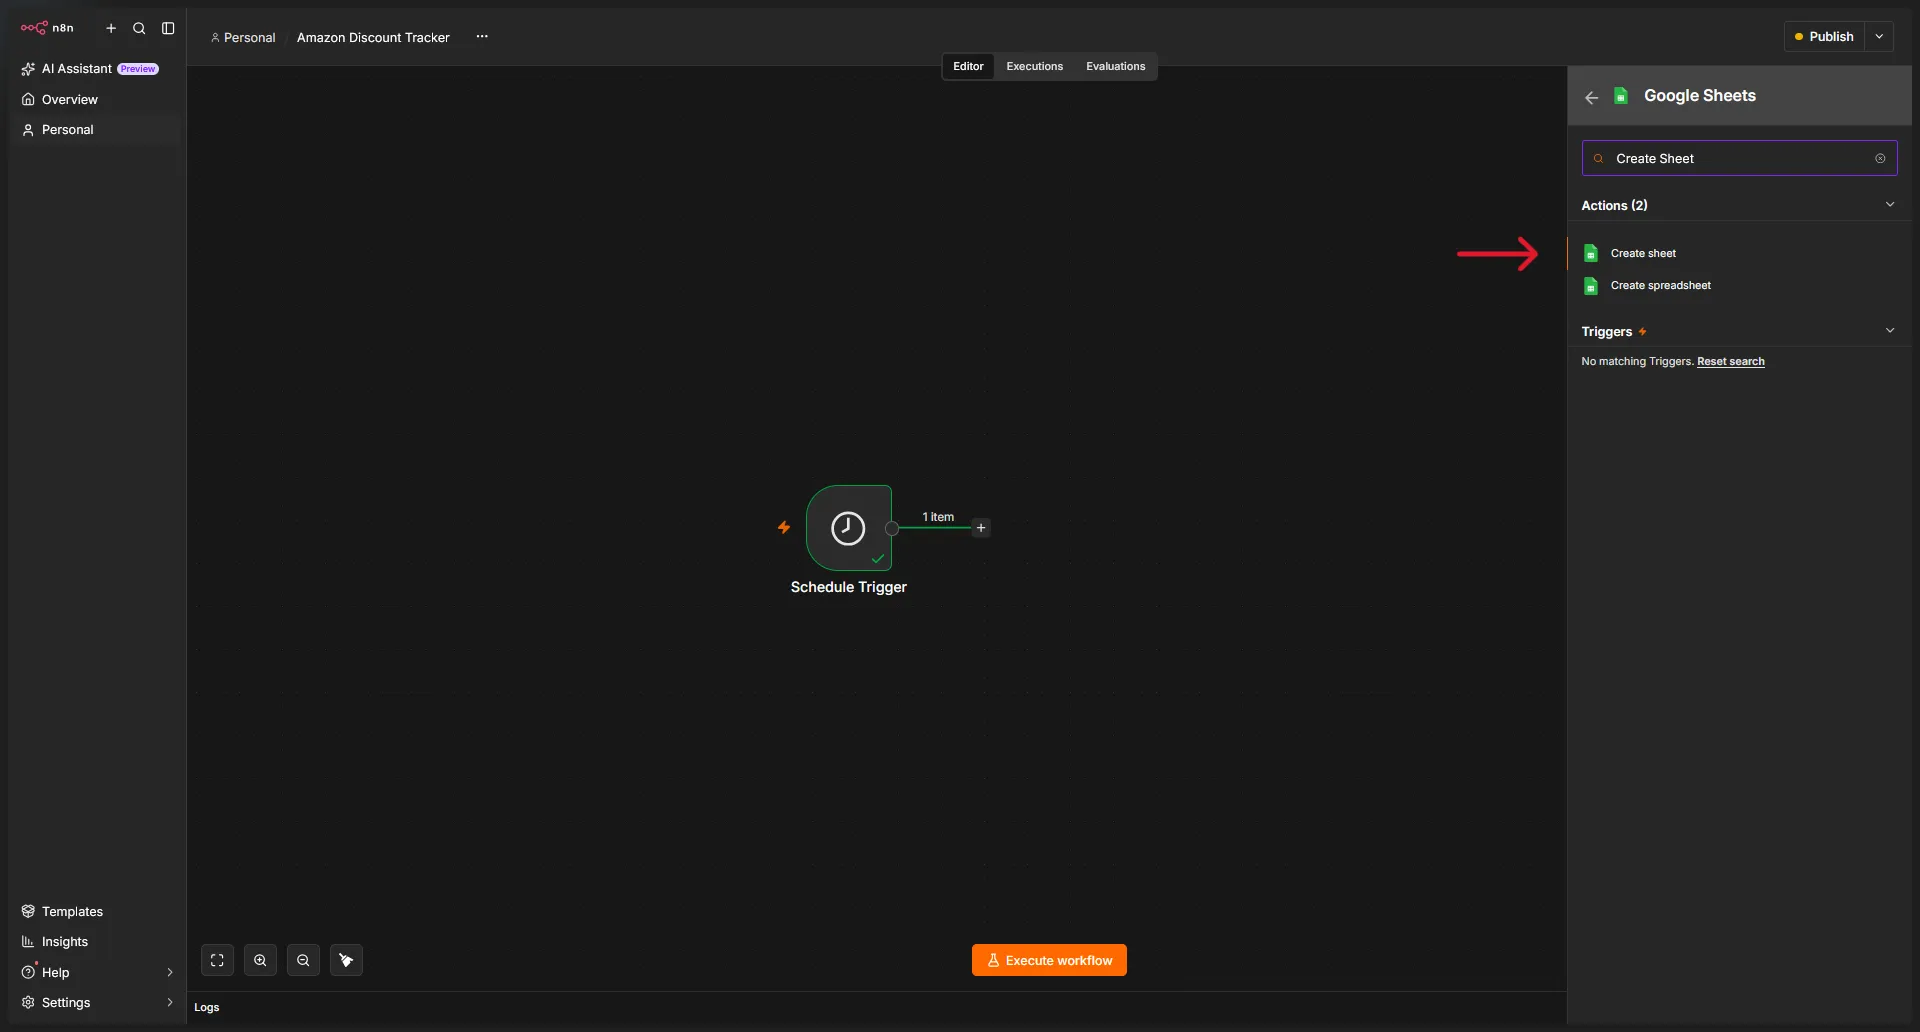
After closing the configuration window, click the plus icon to the right of the Schedule Trigger, search for Google Sheets, and add the node.
For the action, choose Create Sheet.
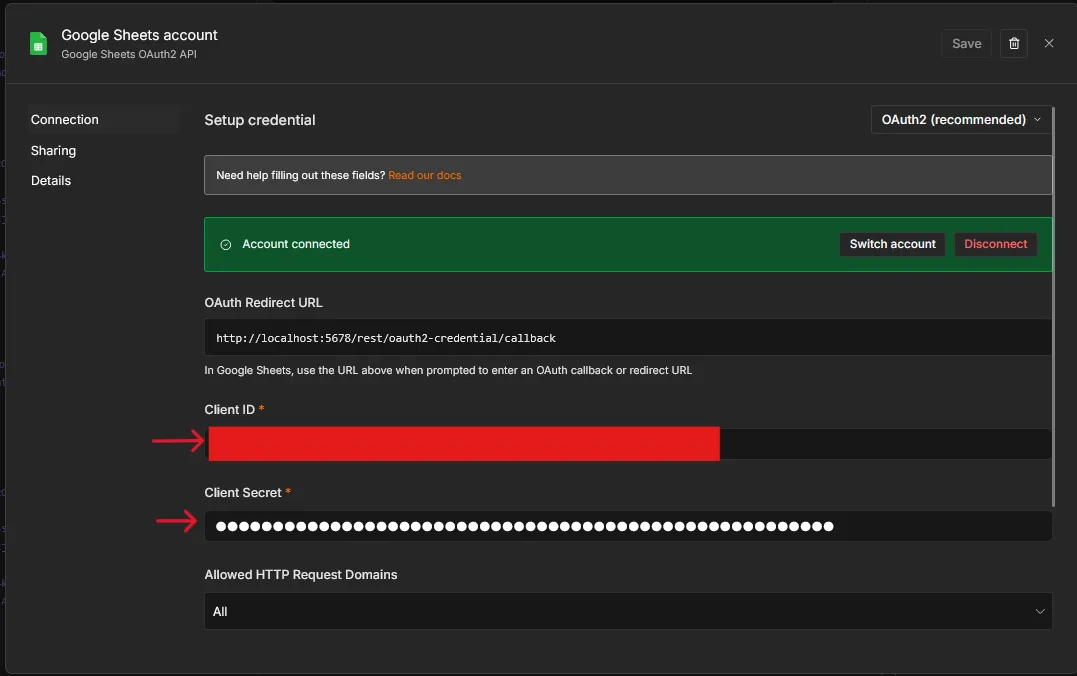
Next, click Connect to Google Sheets. Paste your Google Cloud Client ID and Client Secret, then click Sign in with Google. Complete the authorization and return to n8n.
Now select:
- Your Google Sheets document as the Document.
- The following expression as the Title:
{{ $now.format('yyyy-MM-dd') }}<br />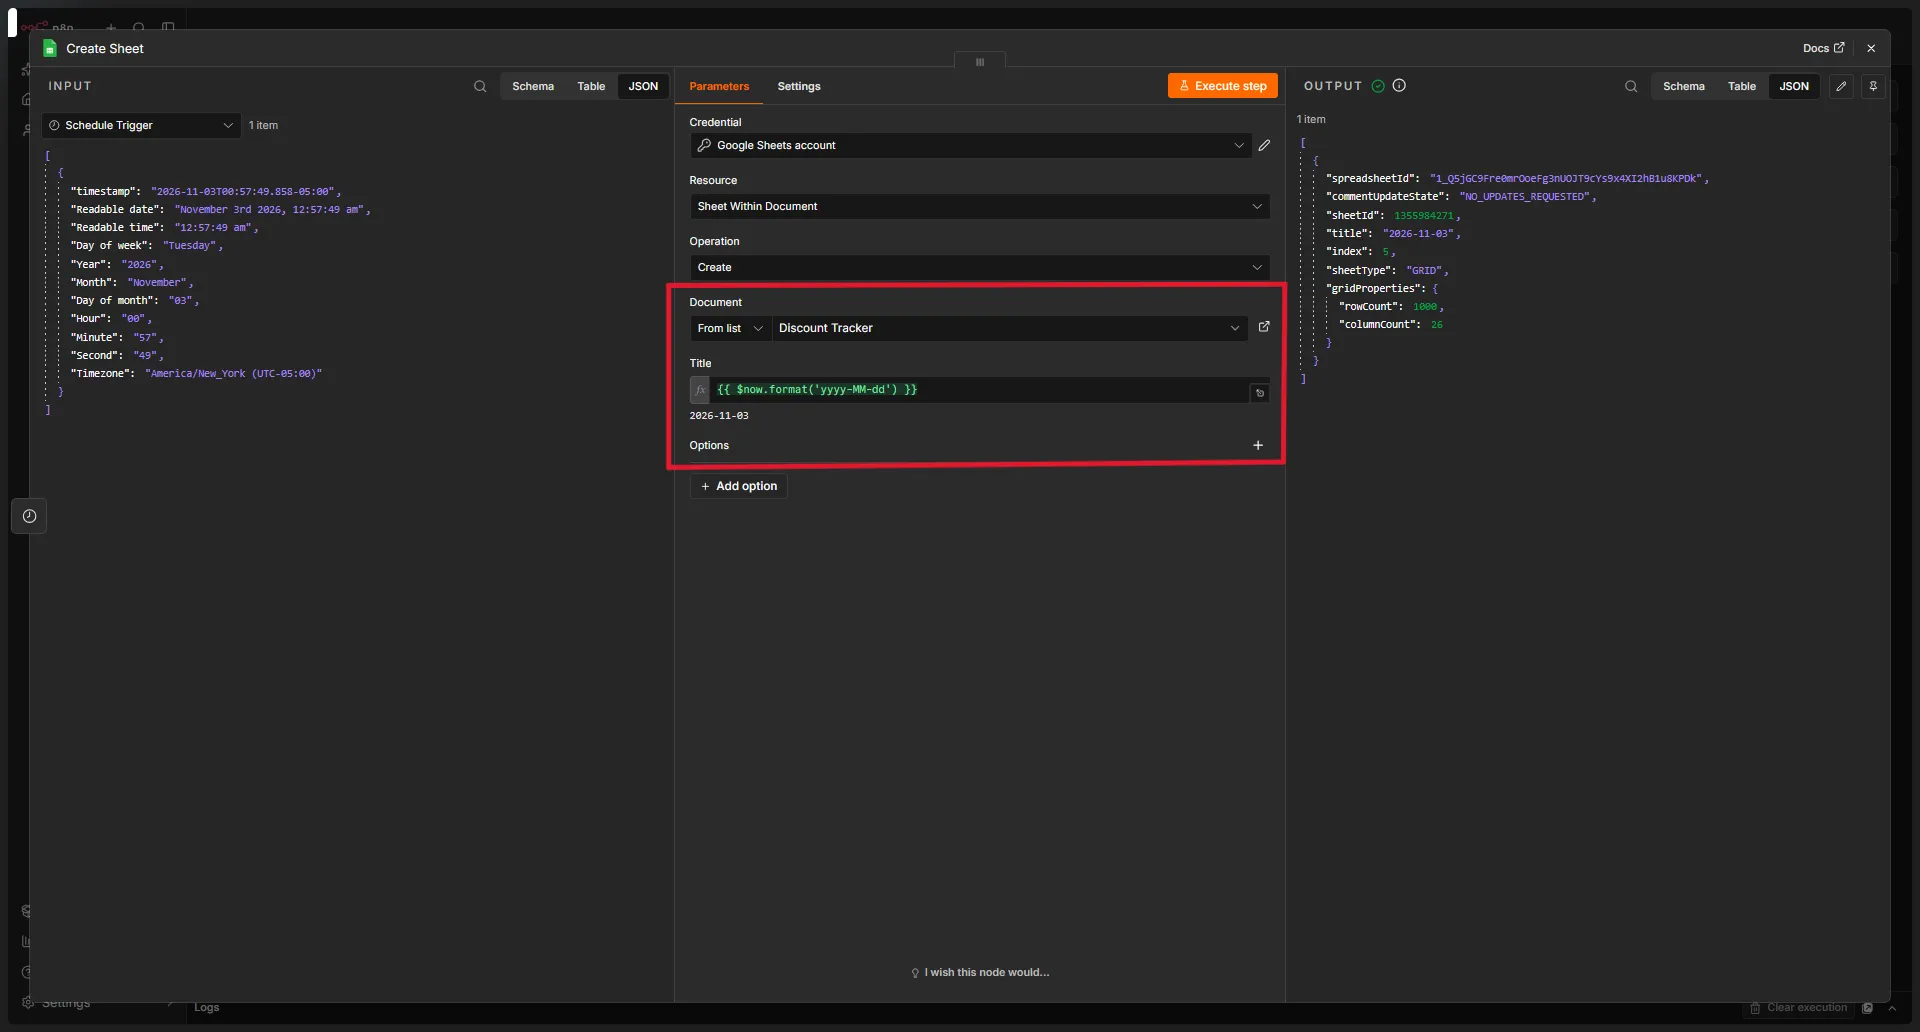
This creates a new tab named after today’s date, such as 2026-10-11. Each run gets its own tab, so you keep a historical snapshot of the discounts for every day.
3. Read the Keywords
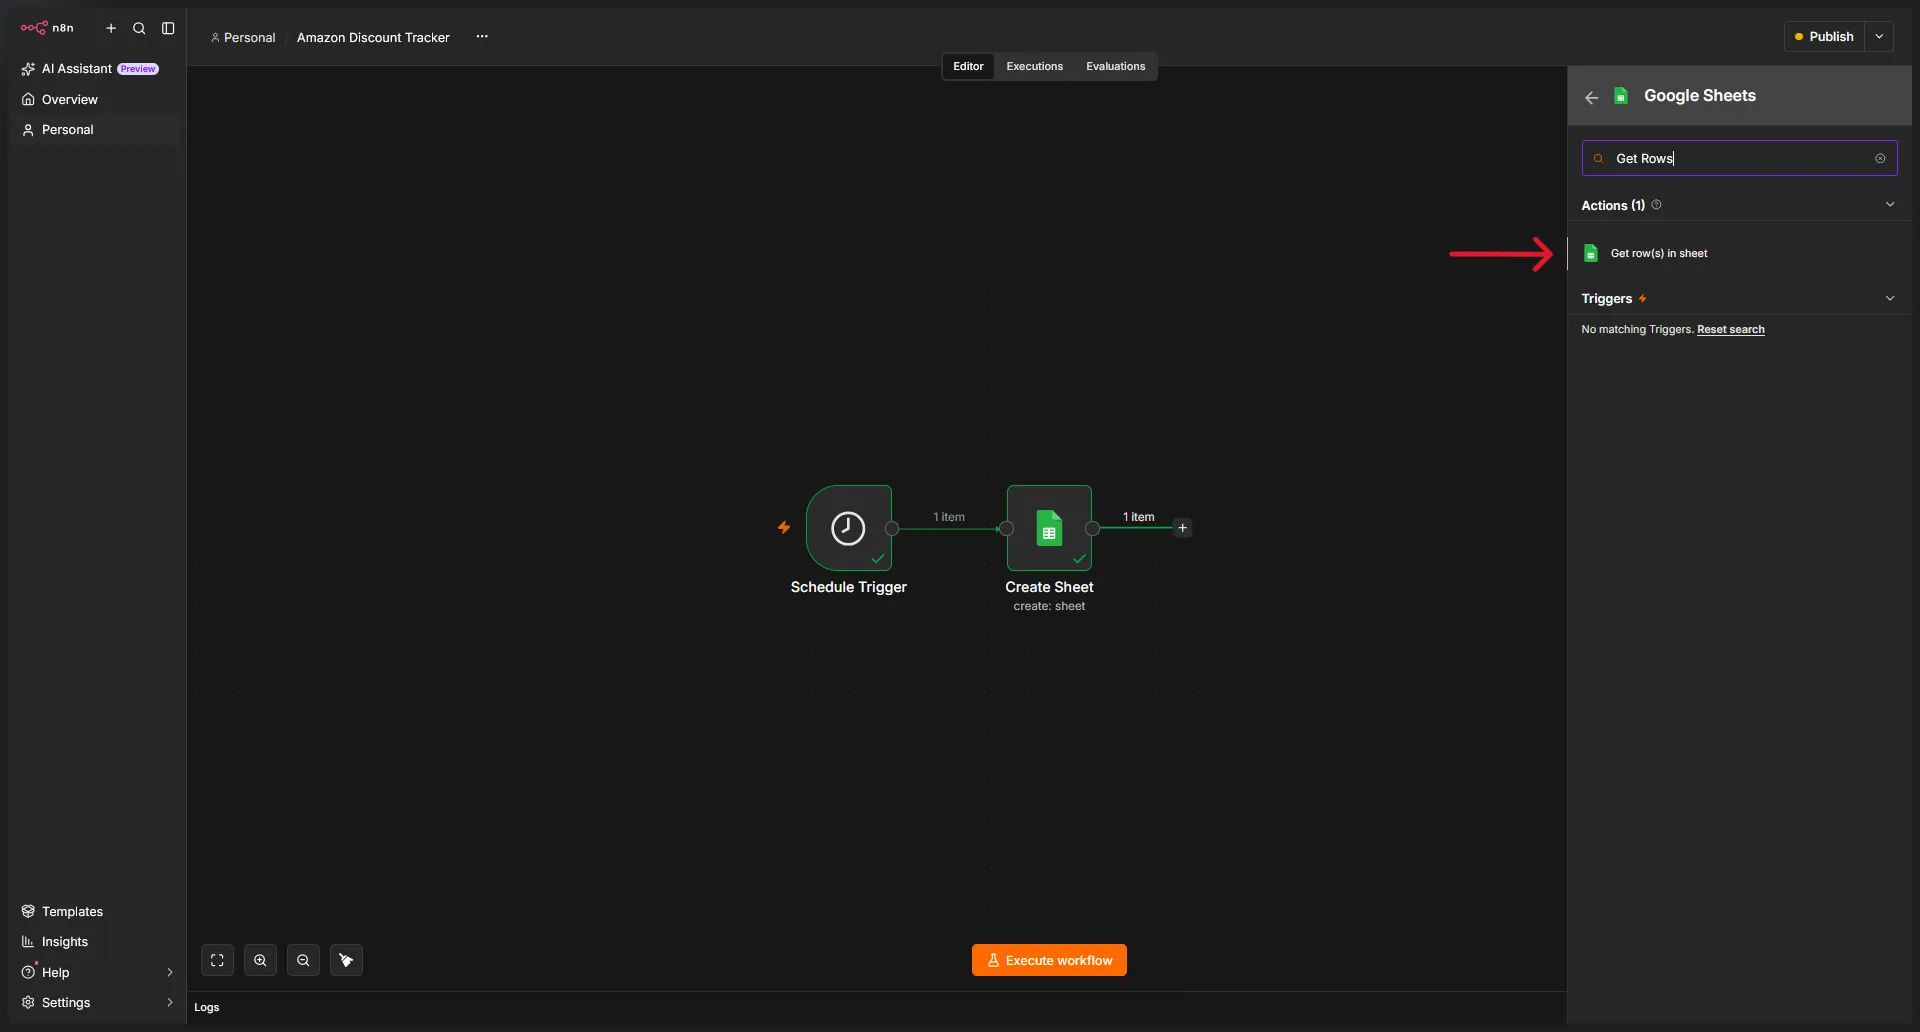
Add another Google Sheets node after the Create Sheet node. For the action, choose Get Row(s) in Sheet. The credentials you created earlier are already available.
Inside the node, select:
- The same Google Sheets document.
- The Keywords tab.
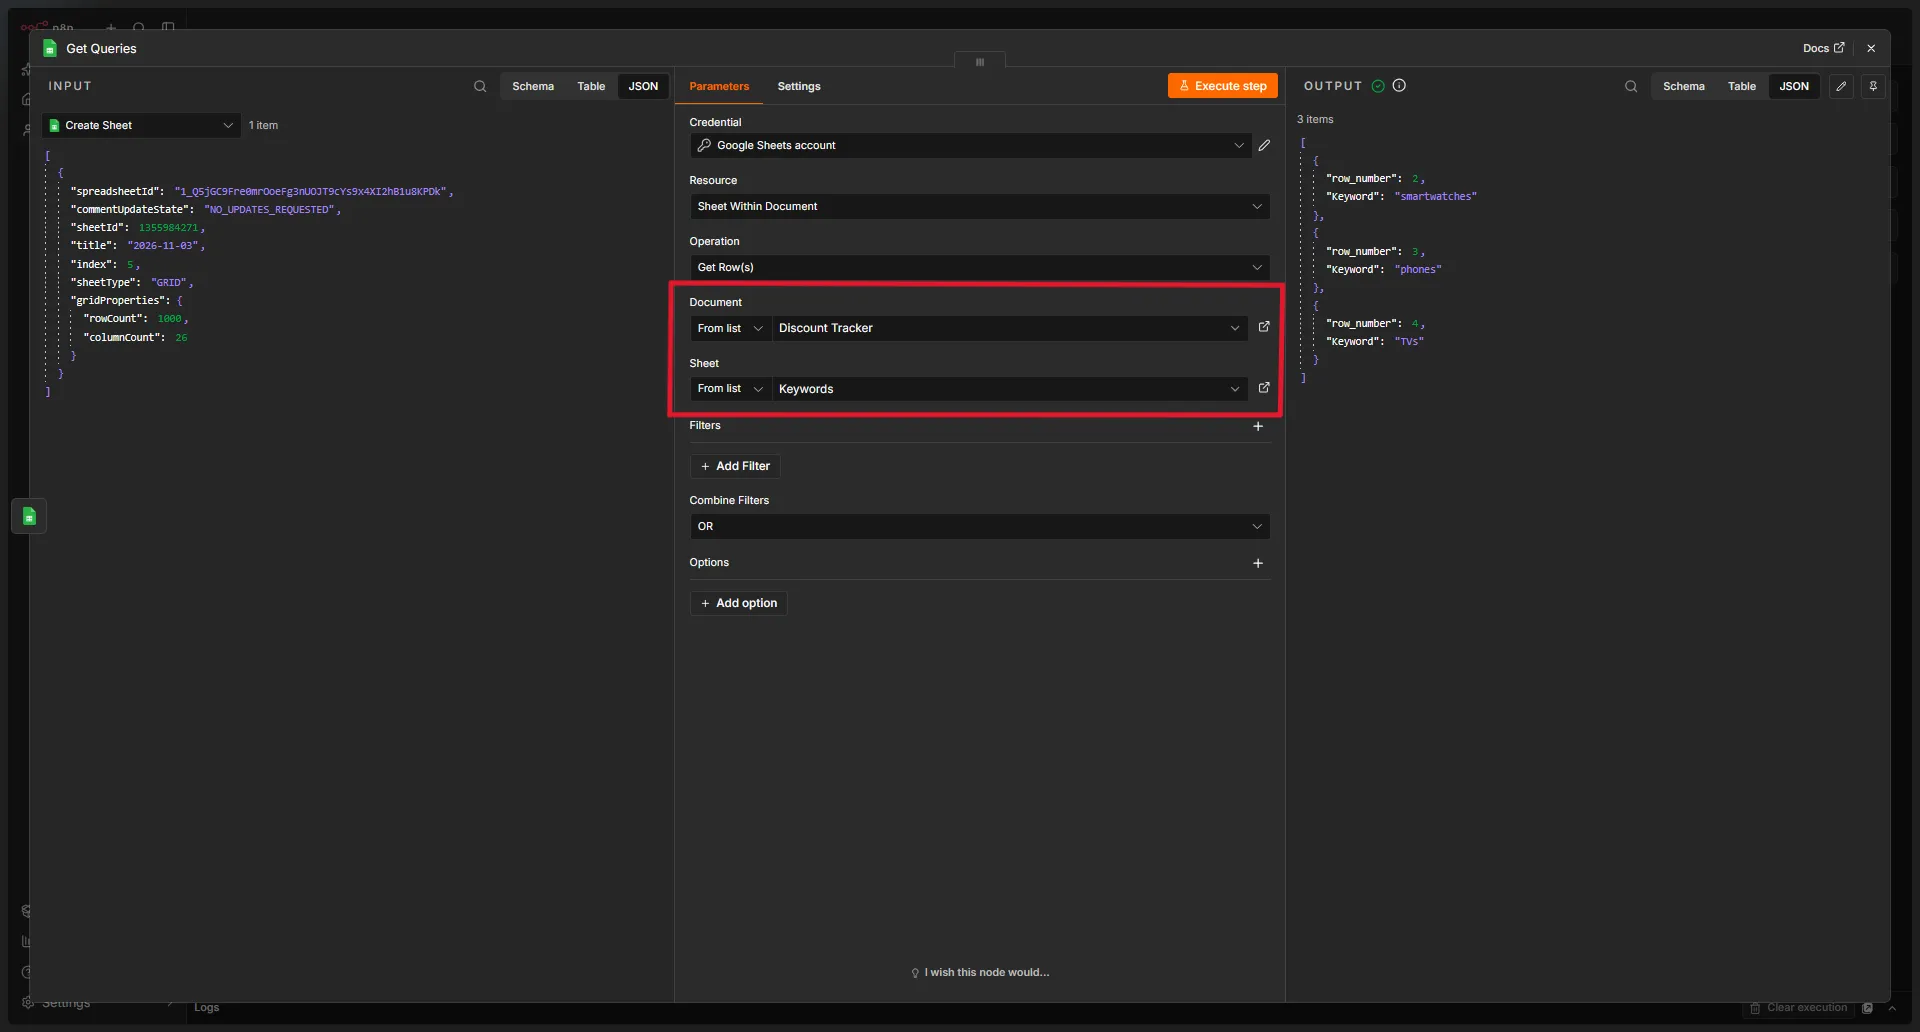
The node reads every row and passes each keyword to the next node.
4. Process Each Keyword Individually
Each keyword needs its own request to the ScrapeHero API. To process them one at a time, add a Loop Over Items node.
Click the plus icon to the right of the Google Sheets node, search for Loop Over Items, and click it.
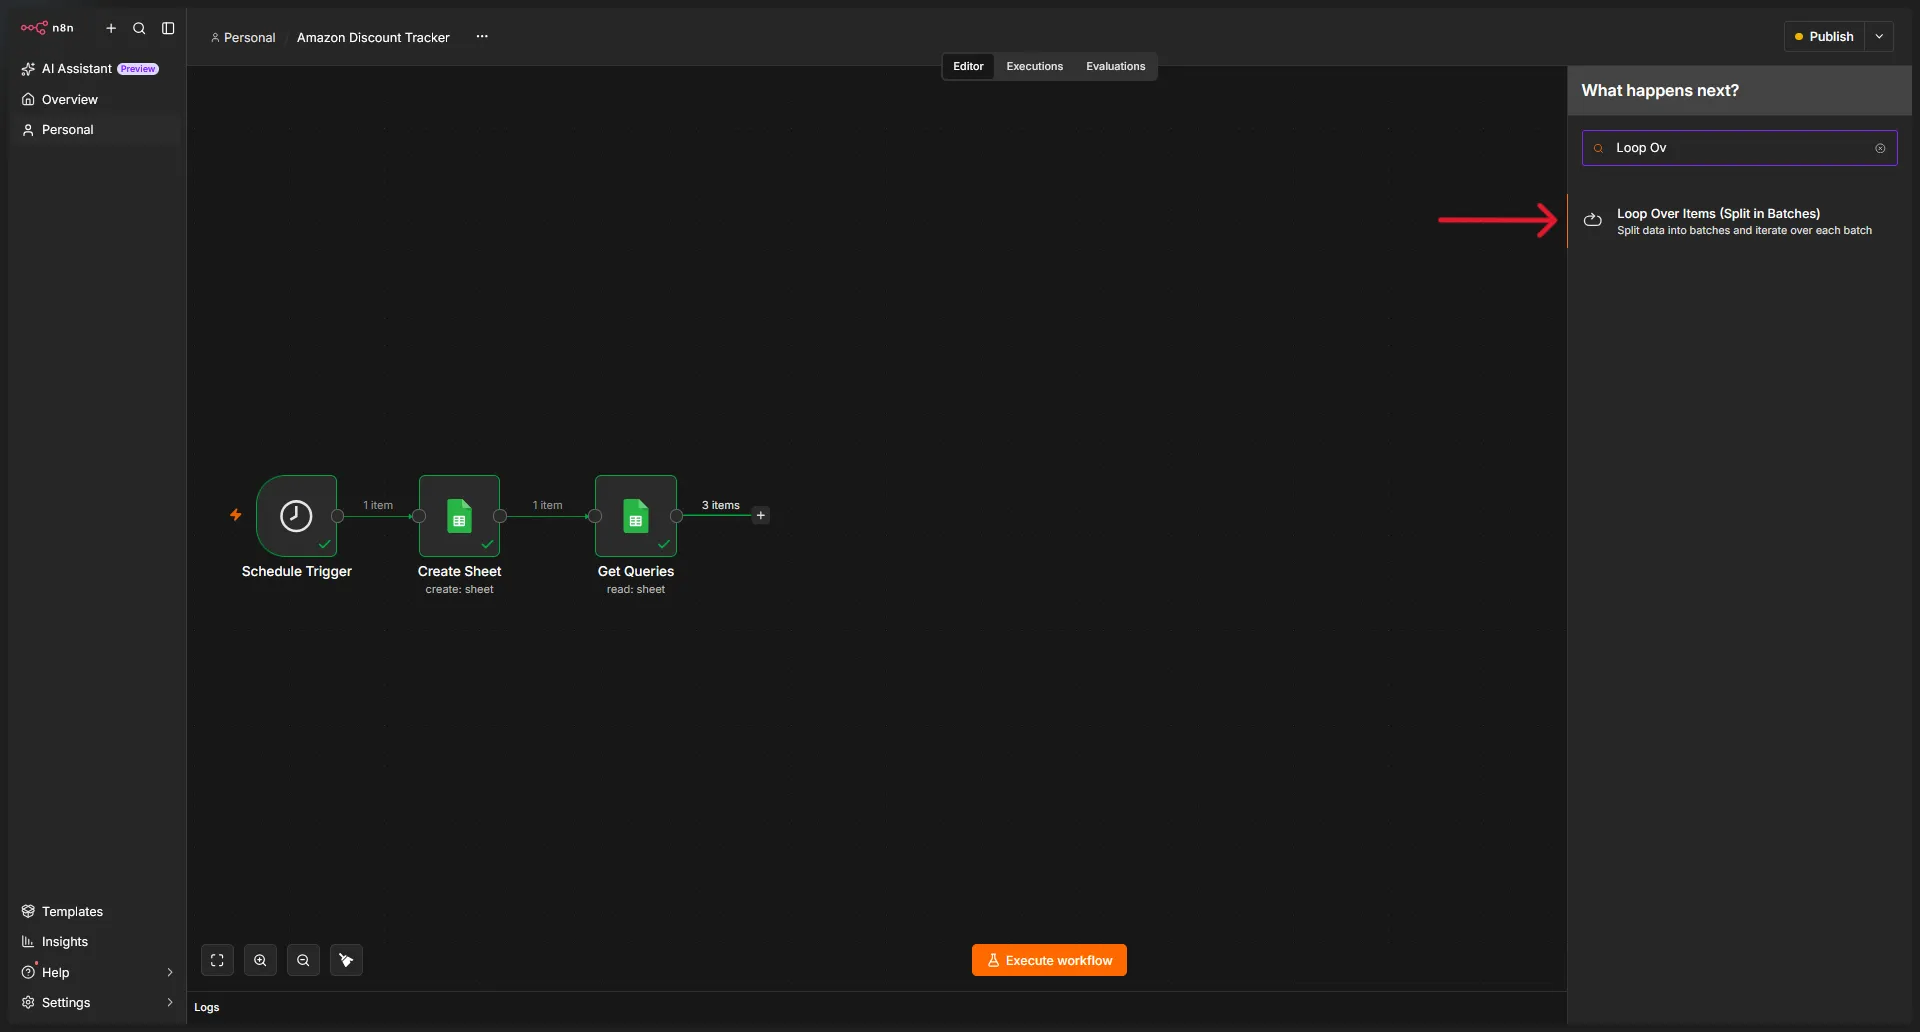
Set the Batch Size to 1.
5. Add the ScrapeHero Node
Next, add the ScrapeHero node to the loop output of the Loop Over Items node.
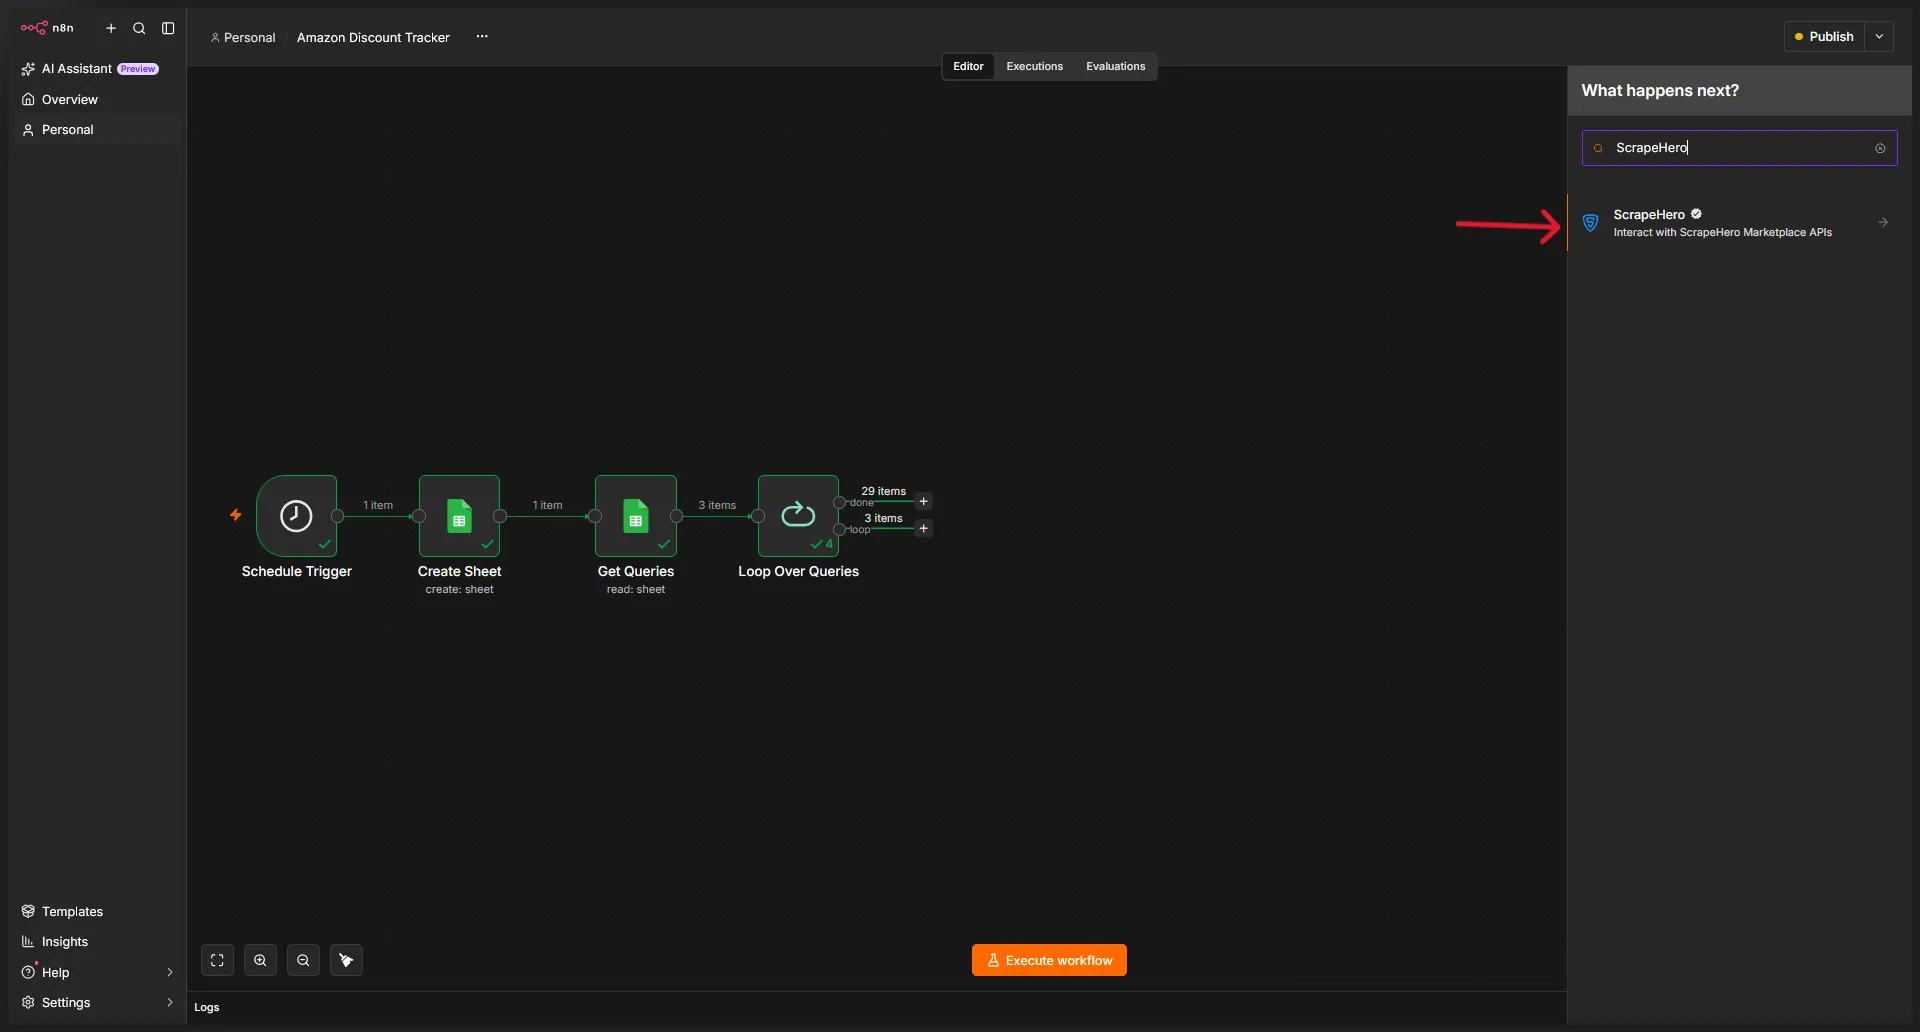
What Does the ScrapeHero Node Do?
The ScrapeHero n8n node allows you to seamlessly connect to ScrapeHero Cloud’s APIs, so that you don’t have to worry about API endpoints for n8n API automation.
Just select any of our APIs from the drop-down and enter the required parameters.
If you are adding the node for the first time, you need to install the ScrapeHero community node first.
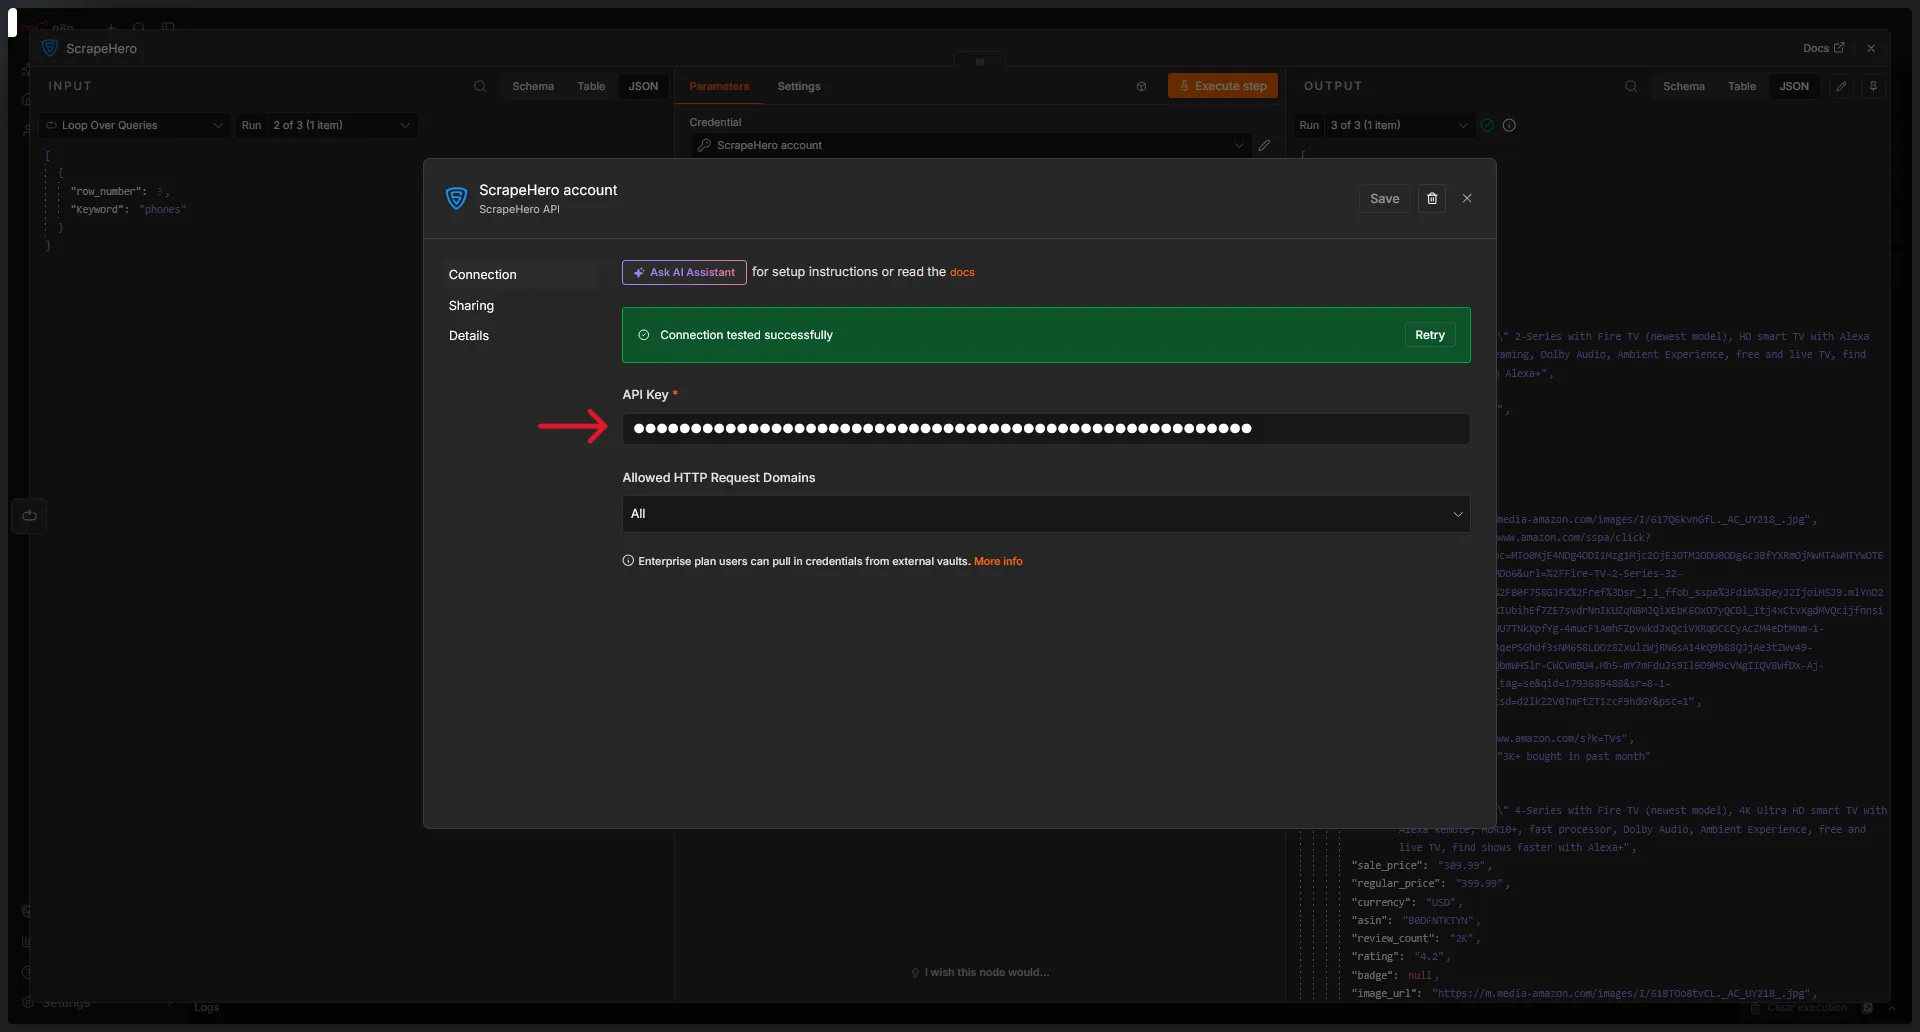
In the configuration window, click Connect ScrapeHero to create the credentials. Then:
- Go to app.scrapehero.com.
- Sign in to your account.
- Click your profile icon.
- Open API Key.
- Copy your API key.
- Return to n8n.
- Paste the key into the ScrapeHero credential field.
- Save the credentials.
6. Configure the API Request
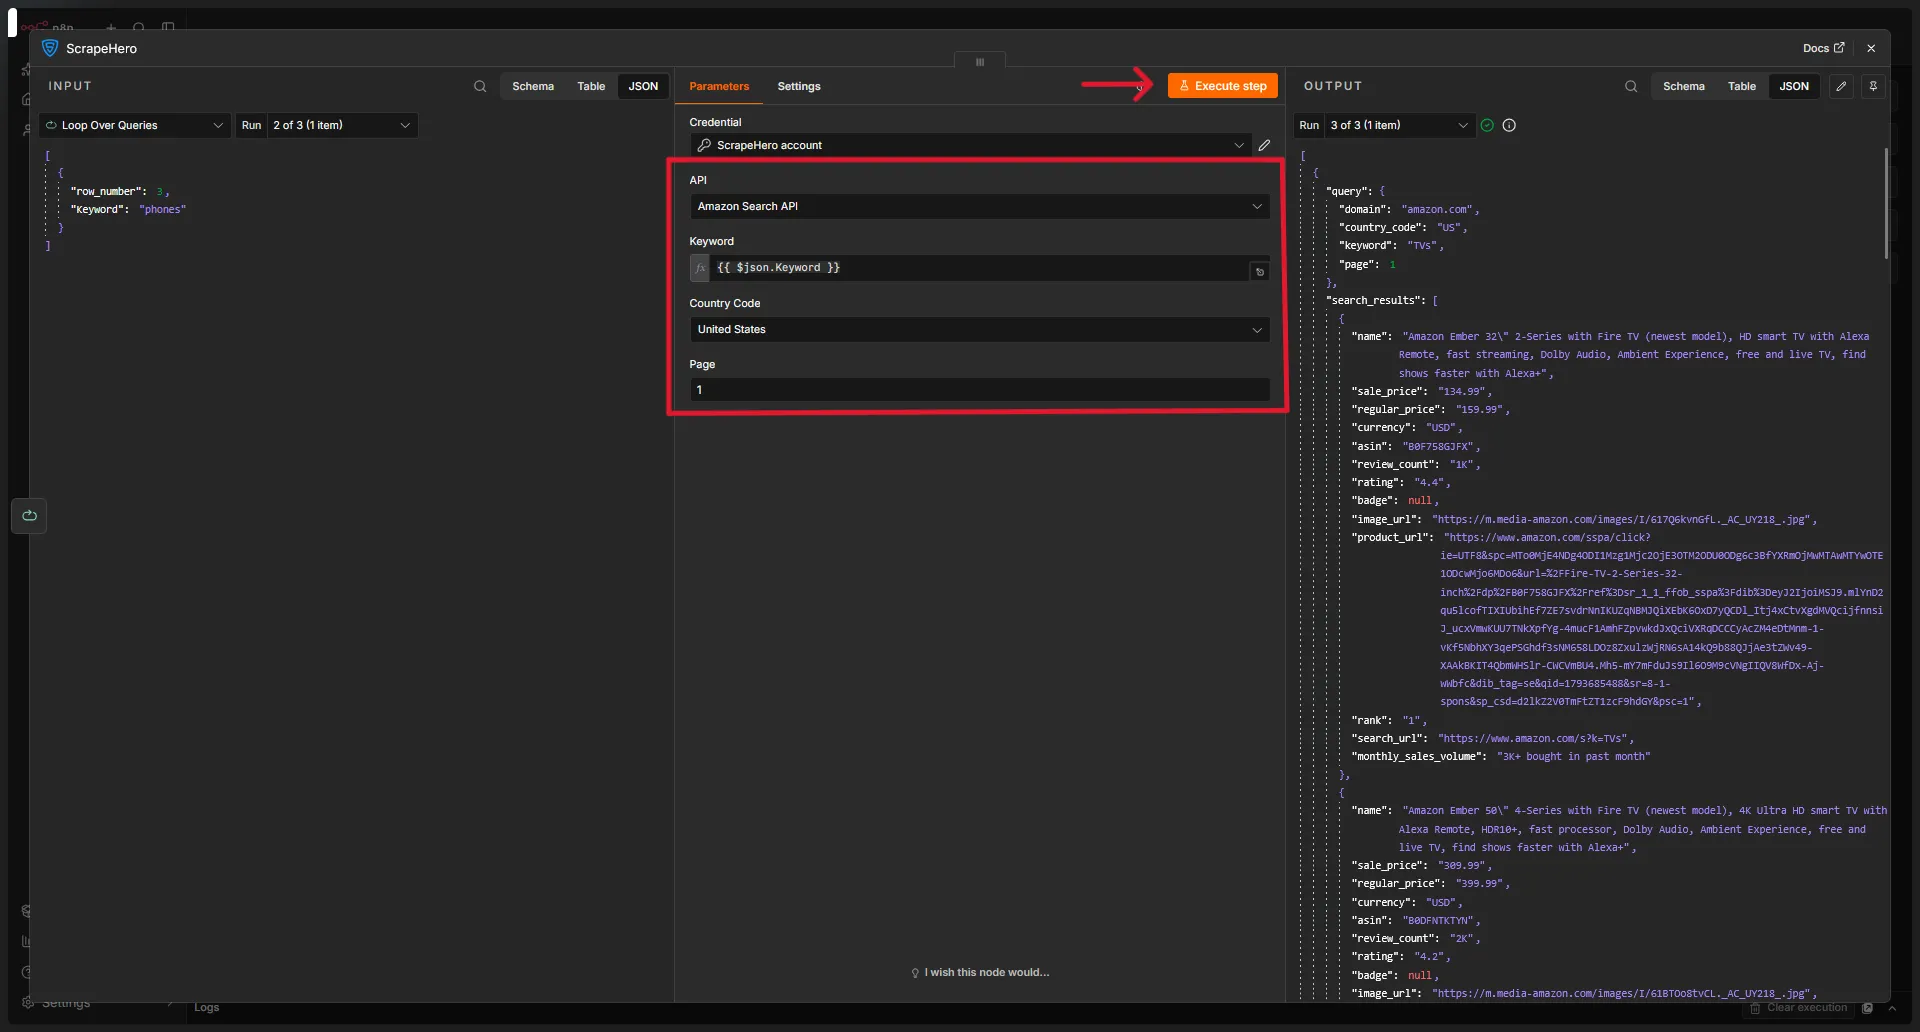
Select Amazon Search API from the API dropdown. This API returns structured search results, including product names, ASINs, prices, and product URLs.
Locate the keyword input field and drag the Keyword value from the Loop Over Items node into it. This creates an expression that sends every keyword in the sheet to the API, one at a time.
Then:
- Select the Country Code (for example, US).
- Set the number of pages to retrieve for each keyword.
The number of pages directly affects how many credits each run uses. Start with a small number while testing.
Click Execute Step to test the request. The output contains the query, search_results, and next_page fields.
After the test succeeds, temporarily pin the output. Pinning prevents repeated test executions from making unnecessary API requests while you configure the remaining nodes.
Filter and Format the Deals
7. Split the Search Results
The search_results field is an array that contains all products from the search. To work with each product separately, add a Split Out node after the ScrapeHero node.
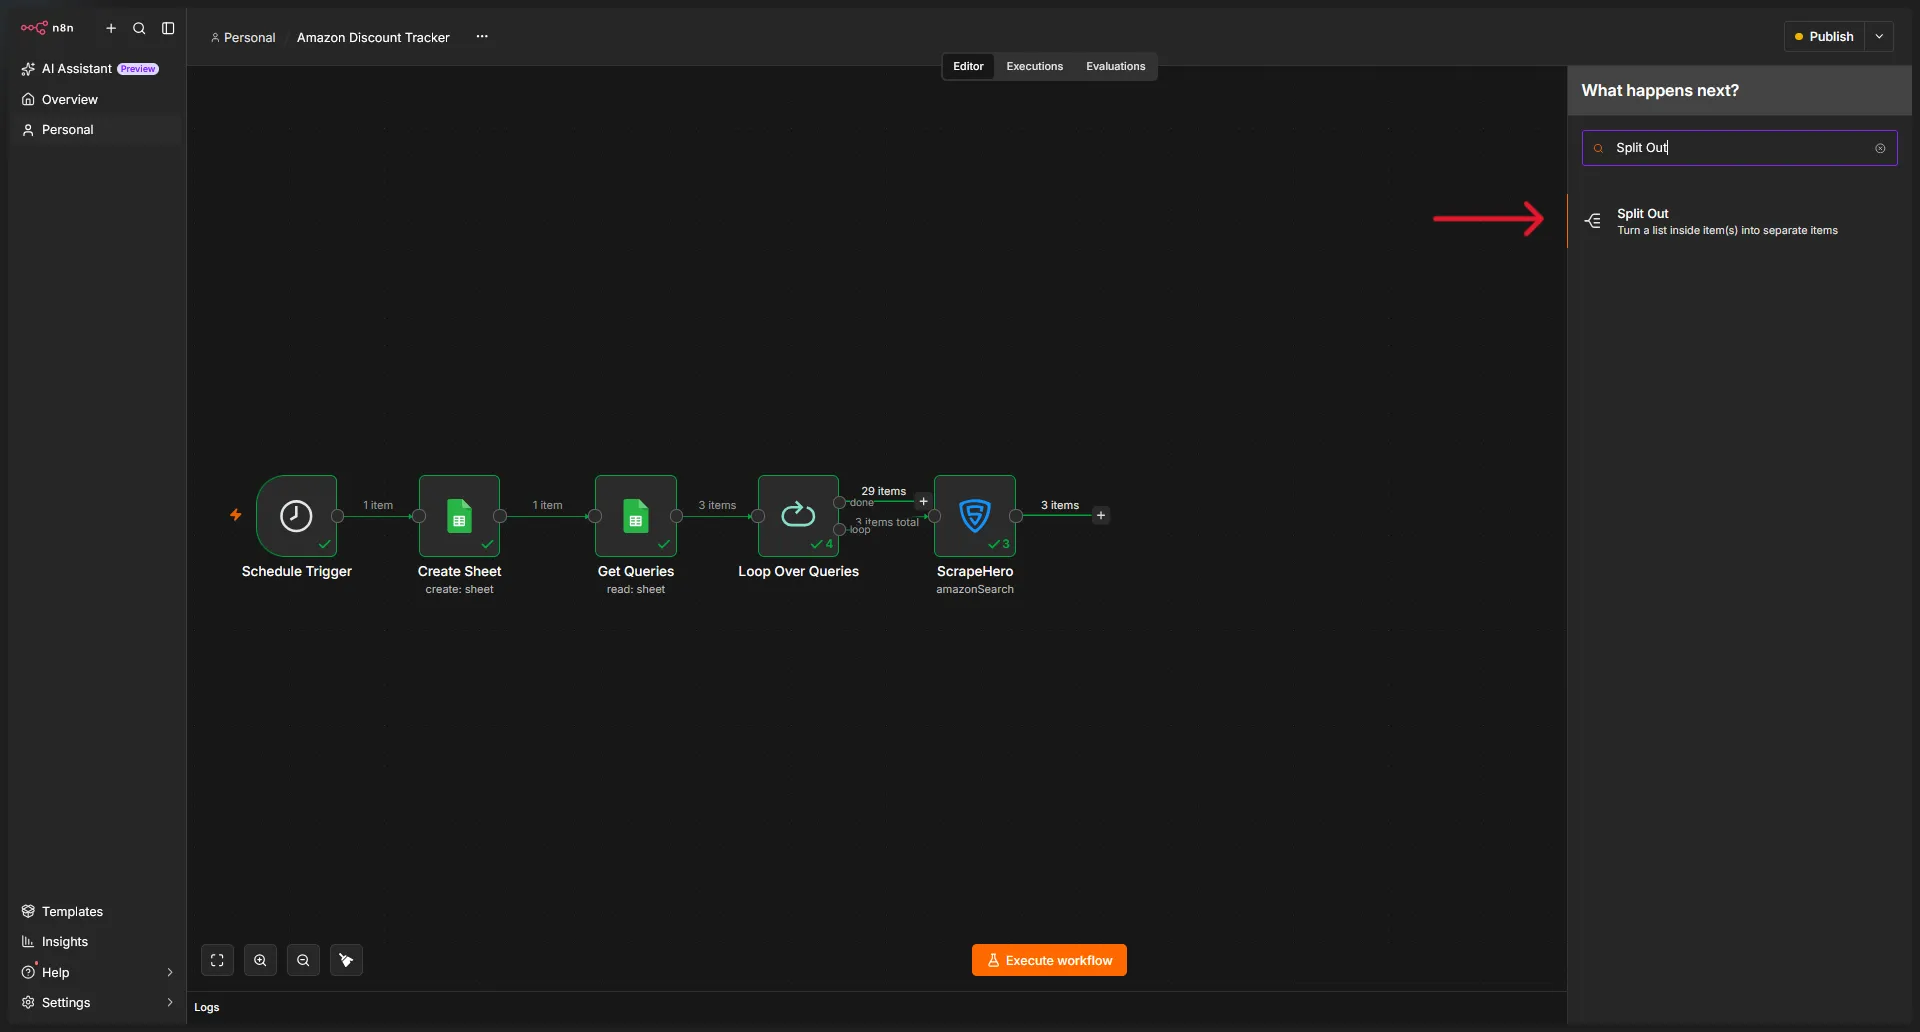
In the Fields To Split Out box, enter:
search_results<br /><br /><img loading="lazy" decoding="async" class="alignnone size-full wp-image-57249" src="https://www.scrapehero.com/wp/wp-content/uploads/2026/11/image5.webp" alt="Configuring the Split Out node split the listings from the ScrapeHero node" width="1920" height="1032" srcset="https://www.scrapehero.com/wp/wp-content/uploads/2026/11/image5.webp 1920w, https://www.scrapehero.com/wp/wp-content/uploads/2026/11/image5-744x400.webp 744w, https://www.scrapehero.com/wp/wp-content/uploads/2026/11/image5-1200x645.webp 1200w, https://www.scrapehero.com/wp/wp-content/uploads/2026/11/image5-768x413.webp 768w, https://www.scrapehero.com/wp/wp-content/uploads/2026/11/image5-1536x826.webp 1536w, https://www.scrapehero.com/wp/wp-content/uploads/2026/11/image5-112x60.webp 112w, https://www.scrapehero.com/wp/wp-content/uploads/2026/11/image5-900x484.webp 900w, https://www.scrapehero.com/wp/wp-content/uploads/2026/11/image5-540x290.webp 540w" sizes="(max-width: 1920px) 100vw, 1920px" />Each product now becomes its own item in the workflow.
8. Keep Only the Discounted Products
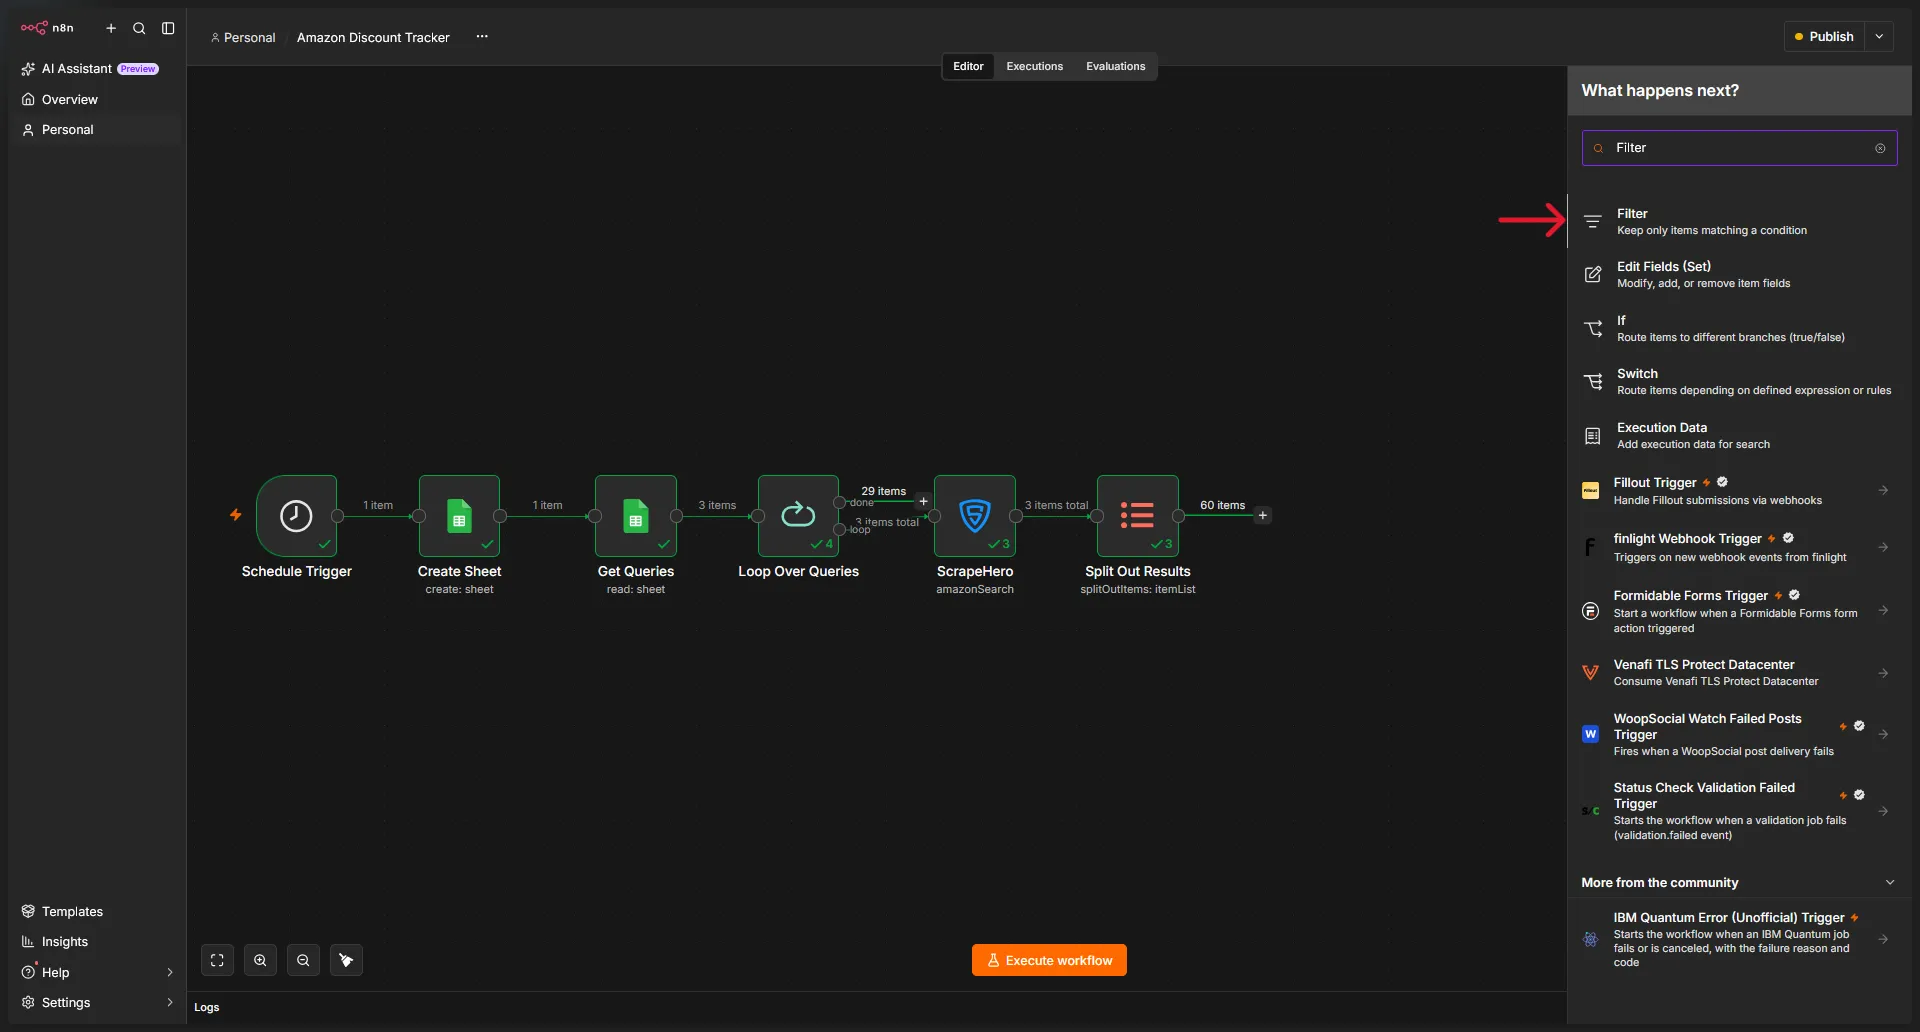
Not every search result is on sale. A discounted product has both a sale price and a regular price, so use these two fields to separate real discounts from regular listings.
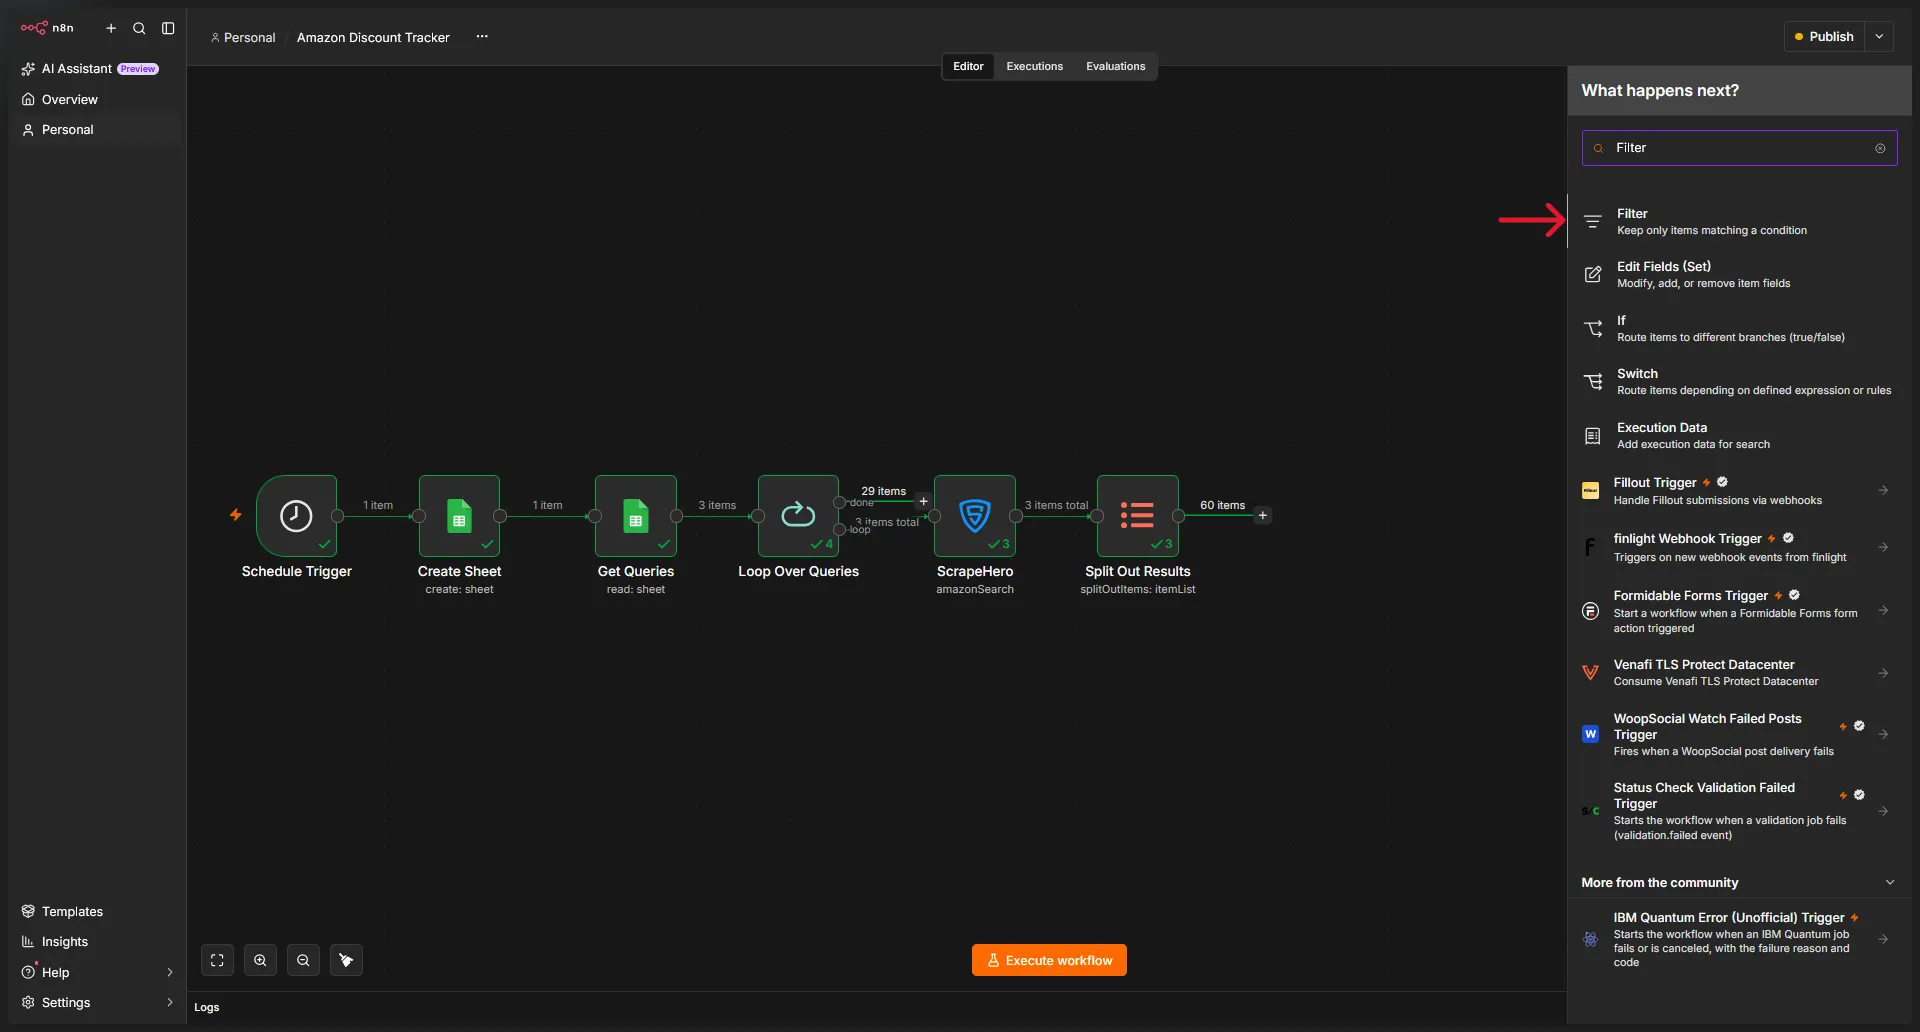
Click the plus icon, search for Filter, and add the node after the Split Out node.
Add two conditions and set the combinator to AND:
- sale_price is not empty
- regular_price is not empty
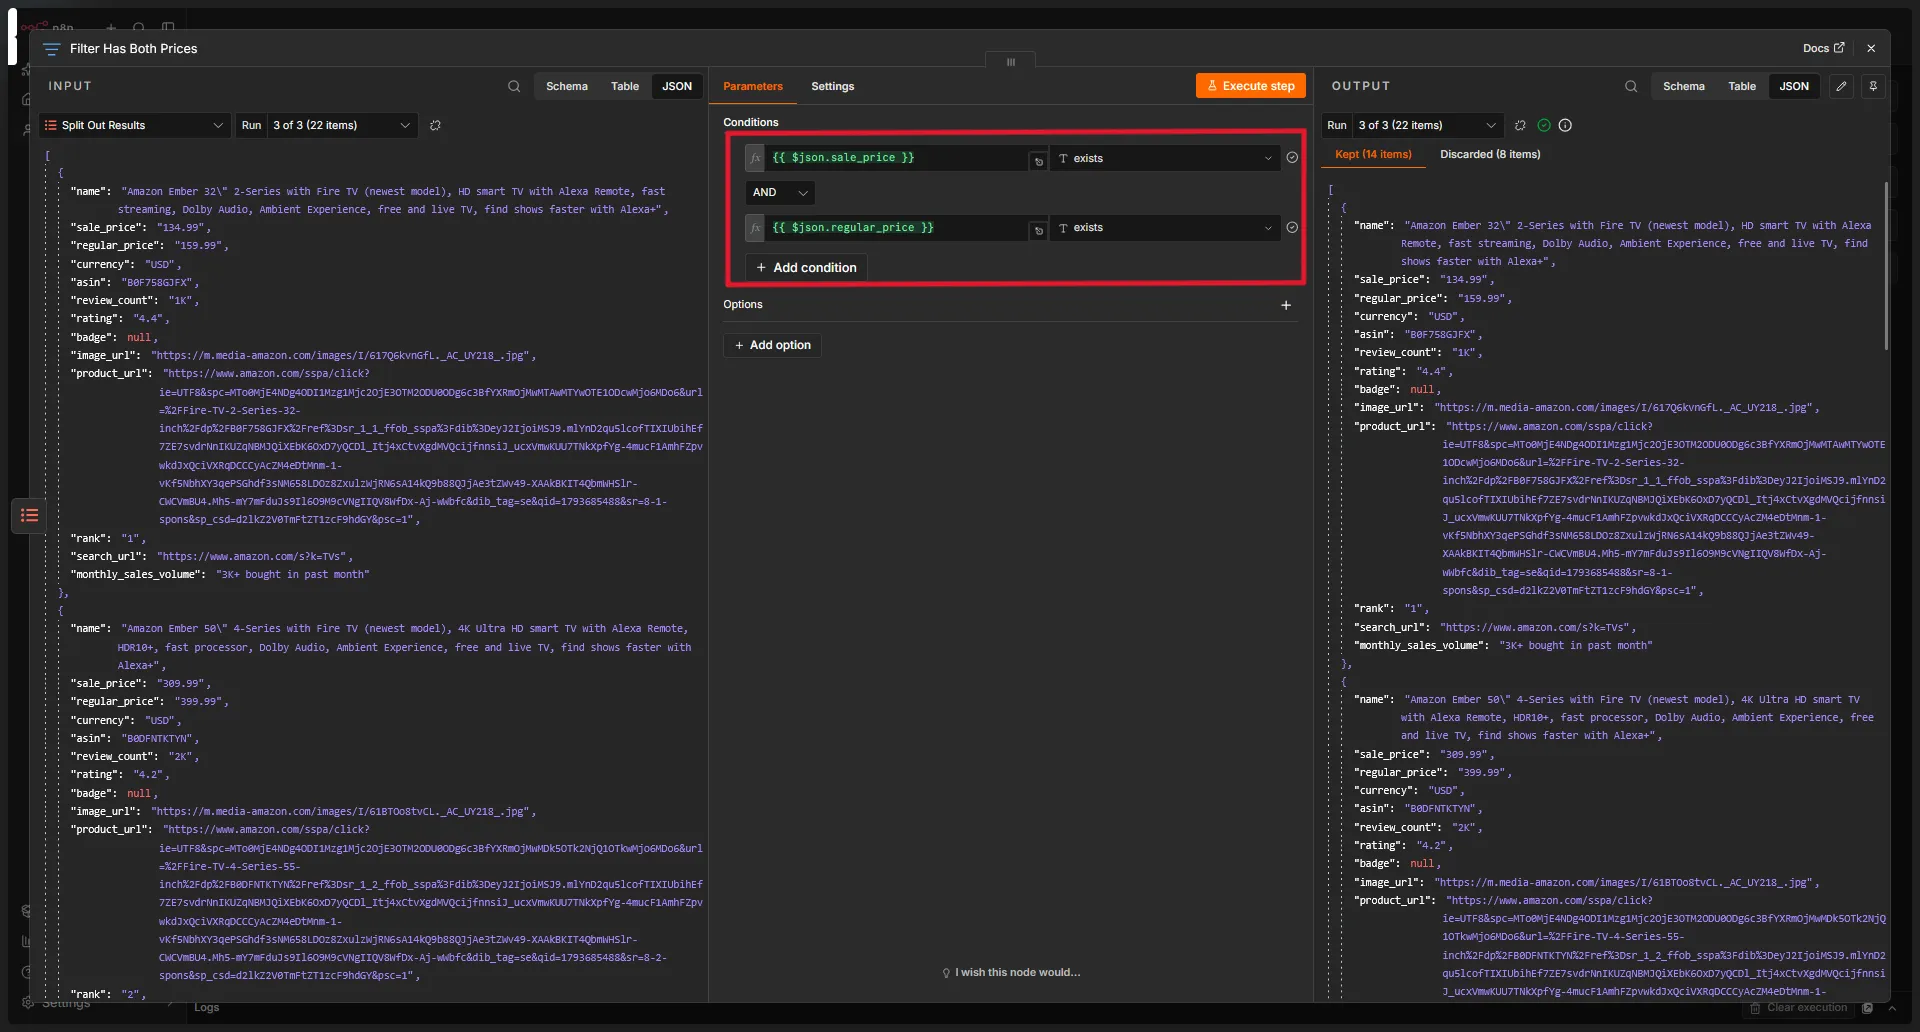
Only products that meet both conditions continue to the next node.
9. Map the Fields and Calculate the Discount
Add an Edit Fields node after the Filter node.
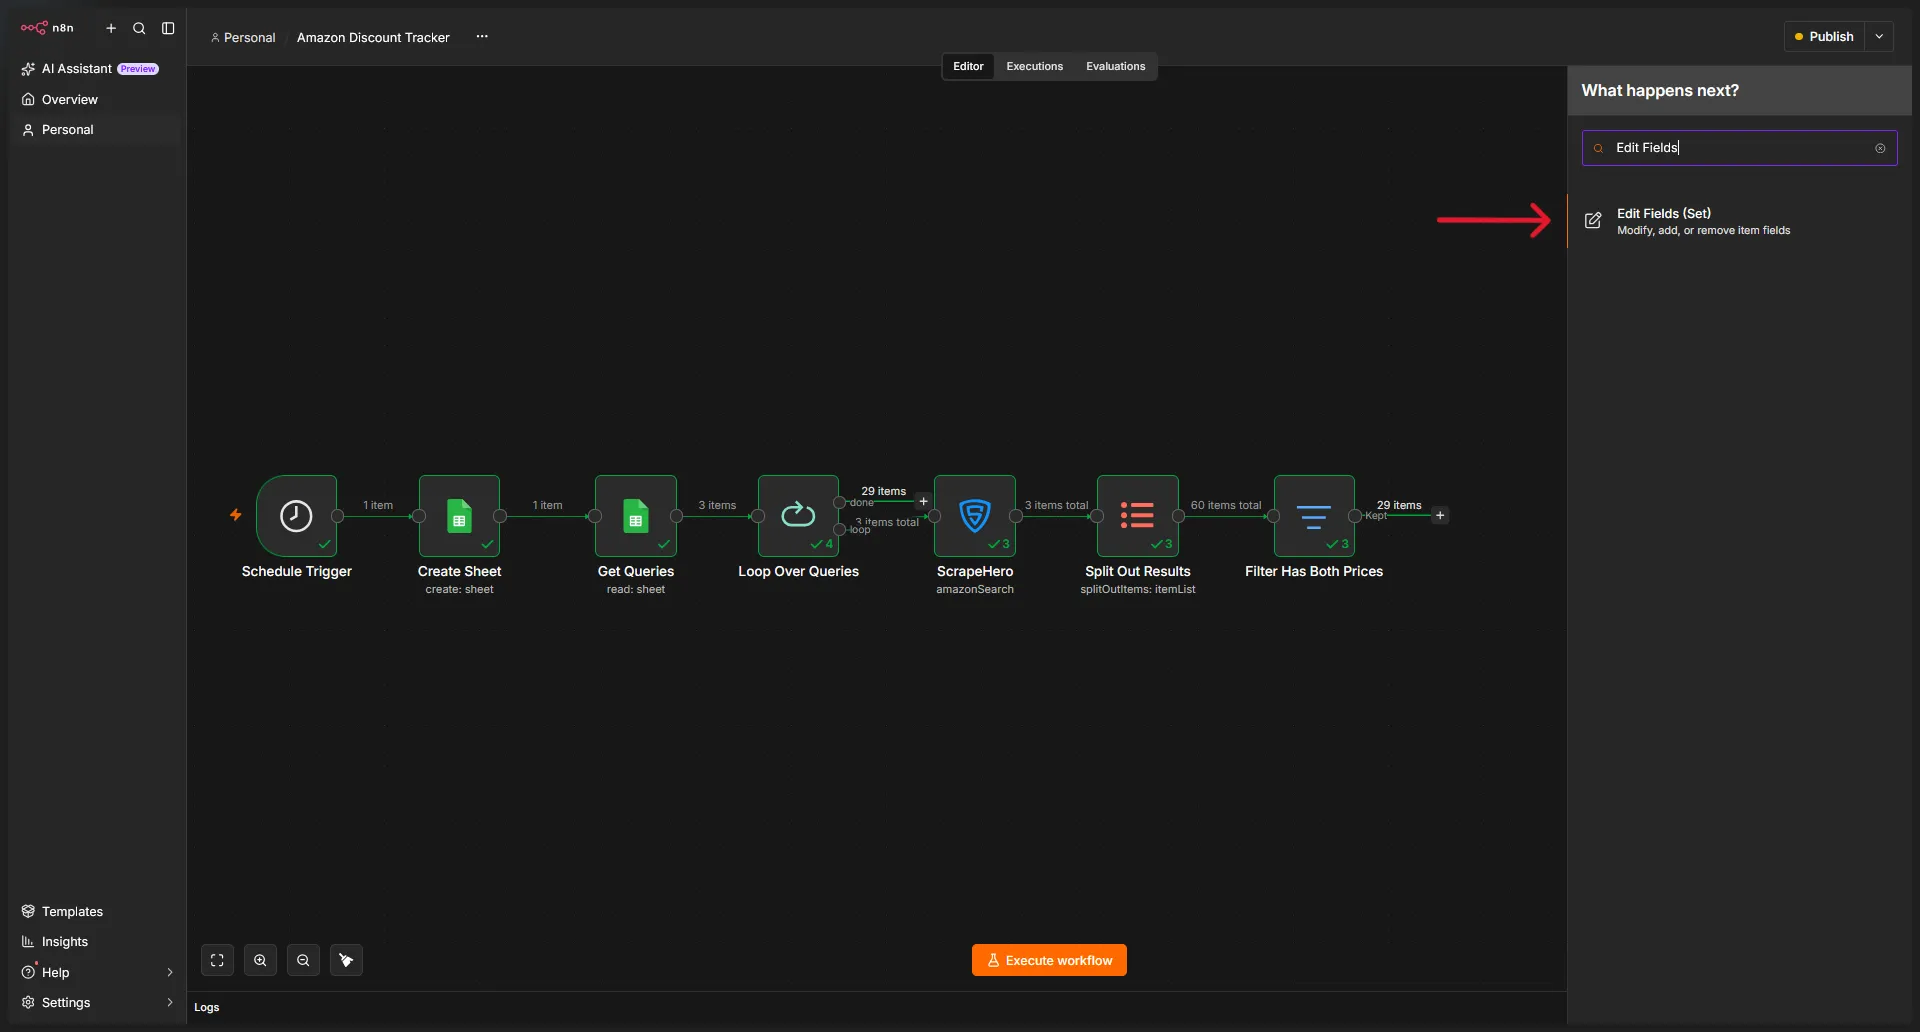
Add the following fields and drag the matching values from the Filter output into each one:
| Output Field | Value |
|---|---|
| ASIN | asin |
| Name | name |
| Sale Price | sale_price |
| Regular Price | regular_price |
| Product URL | product_url |
Then add a sixth field named % OFF and paste this expression:
{{ (($json.regular_price - $json.sale_price) / $json.regular_price * 100).round(2) }}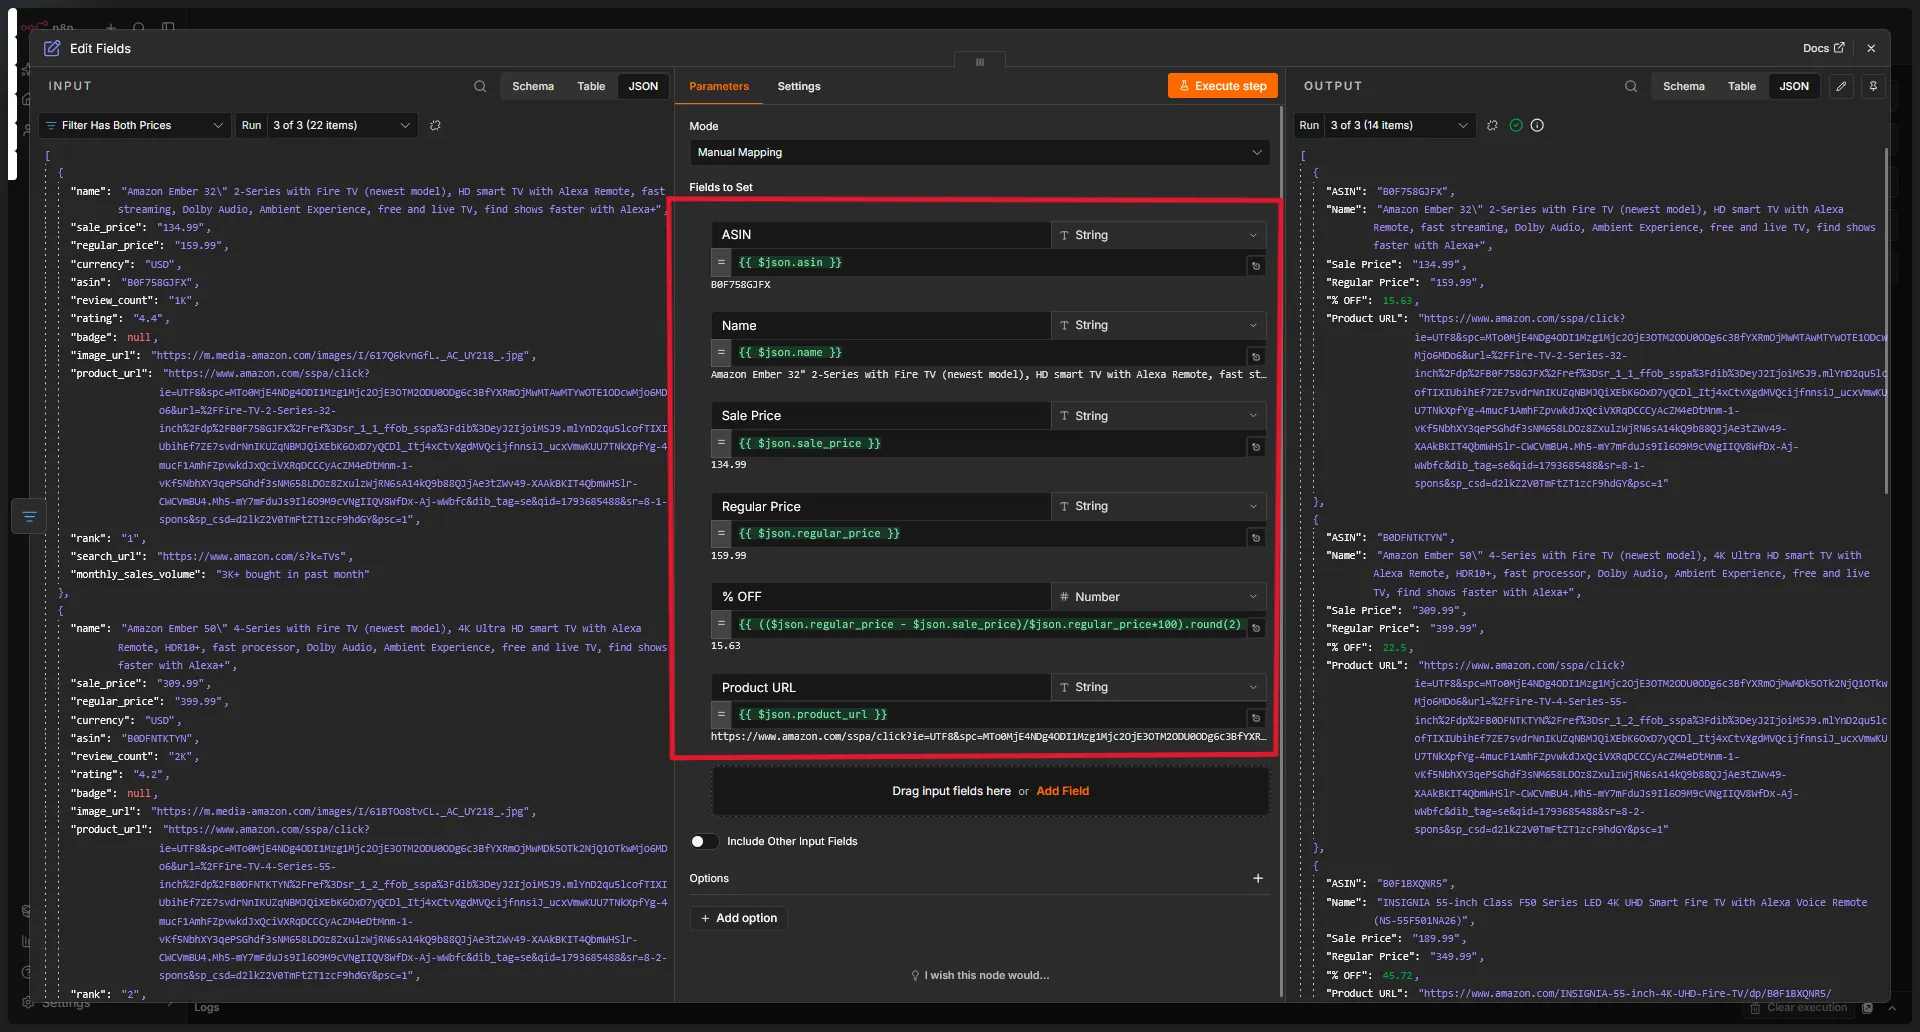
The expression subtracts the sale price from the regular price, divides the result by the regular price, multiplies by 100, and rounds the answer to two decimal places.
Note: The formula works only if both prices are numbers. If your output shows prices as text with a currency symbol, such as “$129.95″, remove the symbol and convert the value first, using .replace(‘$’,”).toNumber().
Save the Deals to Google Sheets
10. Add the Deals to the Dated Tab
Add a Google Sheets node after the Edit Fields node and choose Append Row in Sheet as the action.
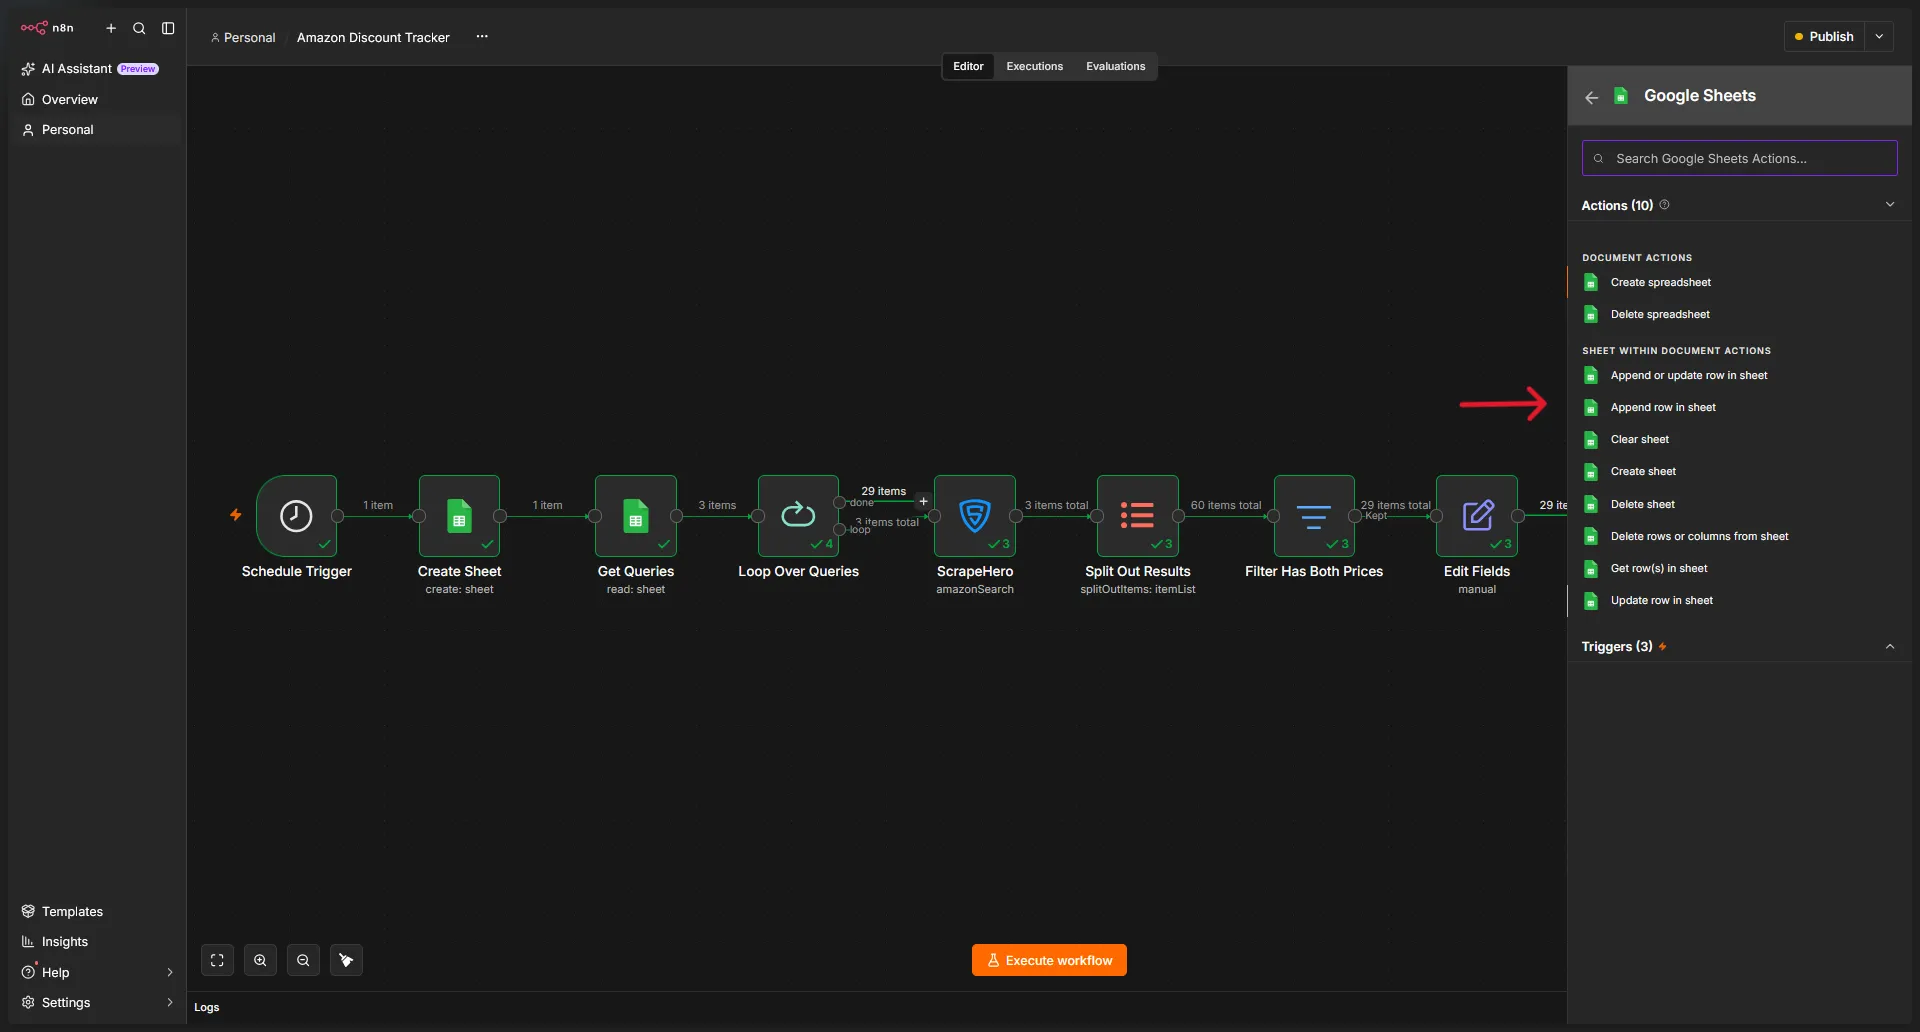
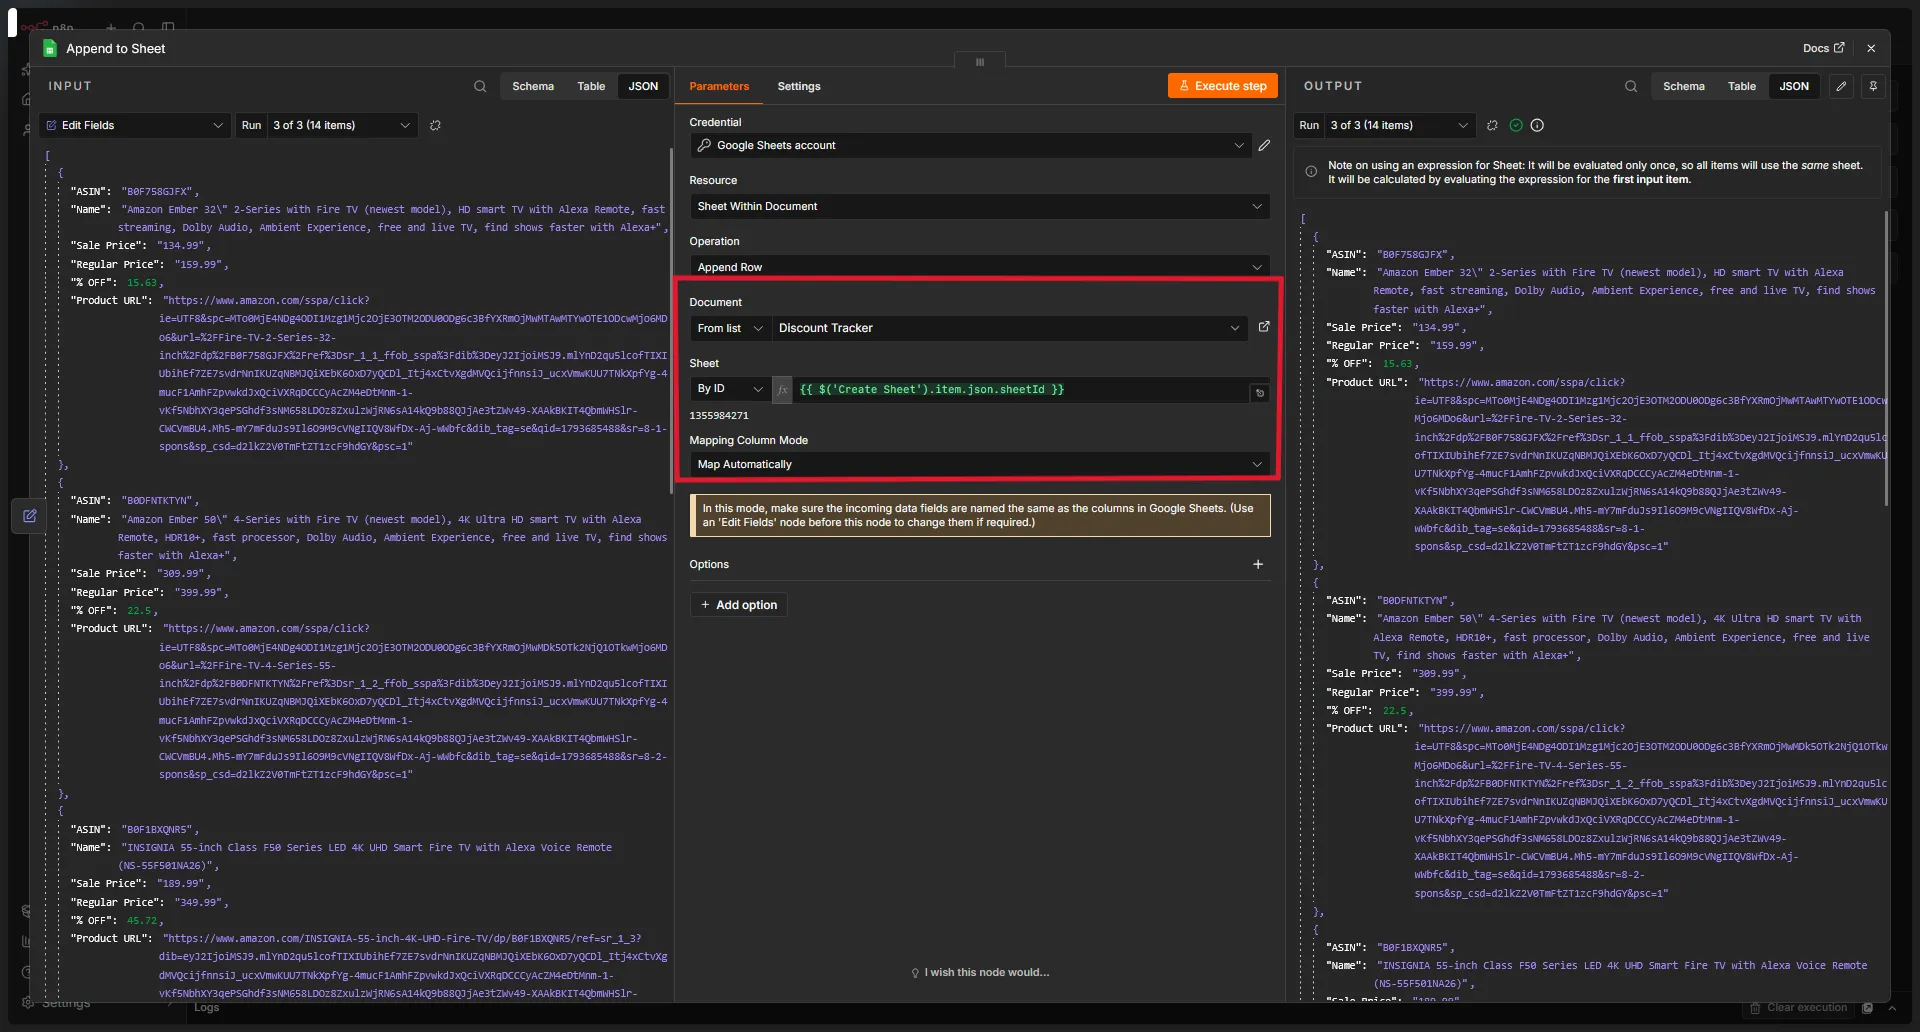
Select your document, then set the Sheet field to By ID and paste this expression:
{{ $('Create Sheet').item.json.sheetId }}This points the node at the tab created in step 2, so you do not need to hardcode the tab name.
Set Mapping Column Mode to Map Automatically.
Test and Complete the Loop
Connect the Loop
Connect the output of the Google Sheets append node back to the Loop Over Items node. This tells the loop to continue with the next keyword.
Test the Workflow
Unpin all the pinned outputs and click Execute Workflow at the bottom of the canvas.
When the run finishes, open your Google Sheets document. You should see a new tab named with today’s date, with these columns filled in for every keyword:
- ASIN
- Name
- Sale Price
- Regular Price
- % OFF
- Product URL
Check that no row has an empty Regular Price. That confirms the filter works.
Publish the Workflow
Confirm that there are no errors. When everything works as expected, publish the workflow.
From then on, n8n will:
- Run at the configured schedule.
- Create a new tab named with the date.
- Read the keywords from Google Sheets.
- Search Amazon for each keyword through ScrapeHero.
- Keep only the products with both a sale price and a regular price.
- Calculate the discount percentage.
- Save each deal to the dated tab.
What This Unlocks for Your Business
Building this workflow to track Amazon discounts with n8n helps you:
- Eliminate manual price checks. No more opening Amazon search pages every day. The workflow searches every keyword automatically.
- Build a historical discount log. Each run creates a dated tab that provides data for trend analysis and spotting promotional cycles.
- Cover more keywords without changing the workflow. Adding a keyword is as simple as adding a row to the Keywords tab.
- Track competitors and find deals. Affiliates can feed discounted products to deal sites, and sellers can see how rival listings are priced.
- Skip the scraper maintenance. ScrapeHero handles data extraction, so you can focus on what to do with the data.
Prefer not to handle API integration? Check out the Amazon Search Scraper on ScrapeHero Cloud instead.
Ways to Improve this n8n Amazon Discount Tracker
You can extend this workflow with:
- Price-drop alerts: Add an If node after Edit Fields. If % OFF is above your threshold (for example, 20), send a Slack, Telegram, or Gmail to get Amazon price drop notifications.
- Stale deal cleanup: Compare each tab against the latest results and remove ASINs that are no longer discounted.
- Multi-country tracking: Duplicate the ScrapeHero node for each country code (such as US, CA, UK, and DE) and combine the results.
- Dashboards: Connect Google Sheets to Looker Studio or Power BI to visualize discounts over time.
- Product enrichment: Send the ASINs to ScrapeHero’s Amazon Product Details and Pricing API to add specifications, images, and reviews.
- Competitor tracking: Add a “Competitor ASIN” column to the Keywords tab and keep only the results that match those ASINs.
Wrapping Up
Tracking Amazon discounts at scale doesn’t have to be a manual process. You can use ScrapeHero’s Amazon Search API and build an n8n Amazon discount tracker.
The ScrapeHero API, accessed via the ScrapeHero node, handles the data extraction. You just have to focus on building the workflow that improves your business.
Sign up for a ScrapeHero API key and build your discount tracker. Do you want additional data points? Tell us your requirements, and we’ll build custom APIs just for you.
Choose ScrapeHero, a comprehensive web scraping service provider, to fully outsource data extraction. We combine automated scraping power with human-in-the-loop oversight to ensure maximum accuracy.
Contact ScrapeHero today to get started.